
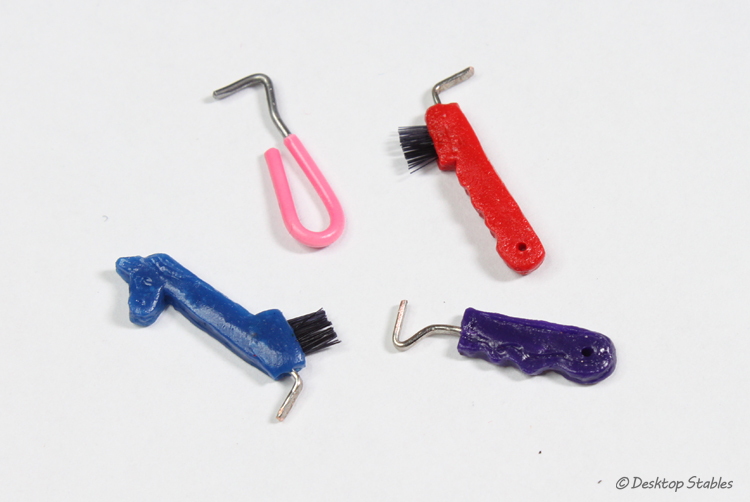
Hoof picks were next on the list of things to make for the grooming kit. I ended up making four different styles since I couldn’t decide on just one.
While these are less tedious than the brushes, they’re still very small and fiddly and require quite a bit of patience. 😛
The easiest way to make a basic hoof pick is from a paperclip. I use the colored plastic-coated ones but they can also be made from the plain ones as well. When I was younger I would make them from the silver clips, then dip the “handle” into paint to give it color.
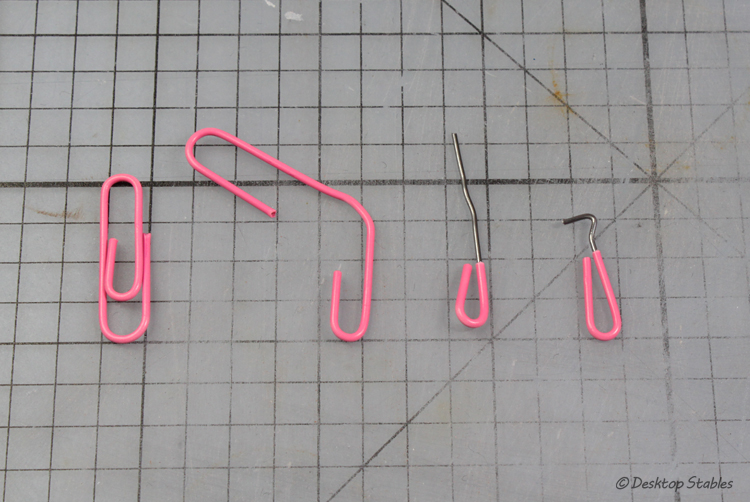
To remove the excess plastic, take a pair of scissors or your wire cutters and gently score around the clip. You want to cut through the plastic, not the metal. It doesn’t take much pressure and can be pulled off once it’s cut through.
Bend the top into shape, cut off the excess and ta-da! A tiny hoofpick.

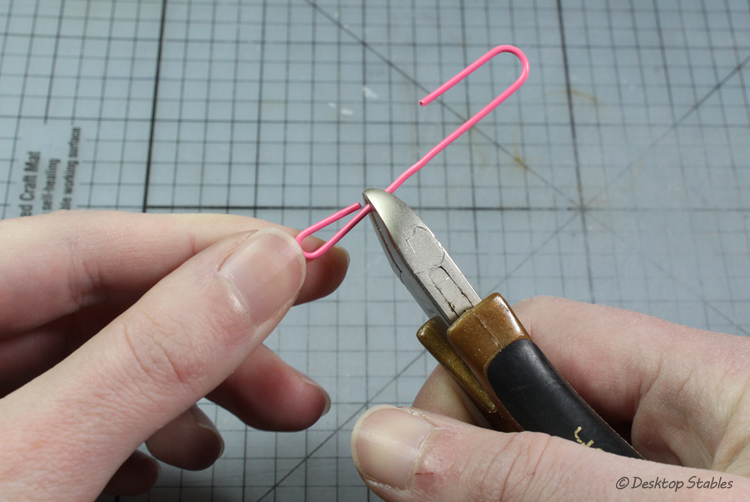
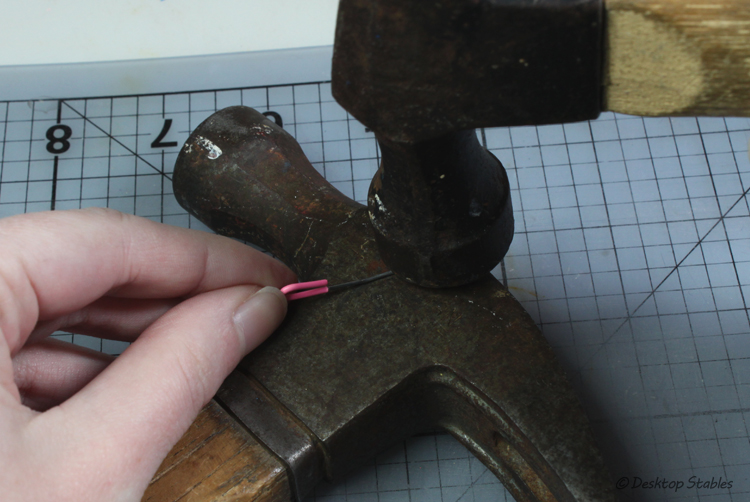
I like to take mine a step further and flatten out the actual pick. I’ll do this by leaving the top unbent and flatten the wire with a hammer. Because I don’t have an anvil of sorts, I use a second hammer underneath. Also, don’t smash your fingers like I usually do.
Another way is to bend the clip into shape, then hammer it over an edge… if that makes sense…
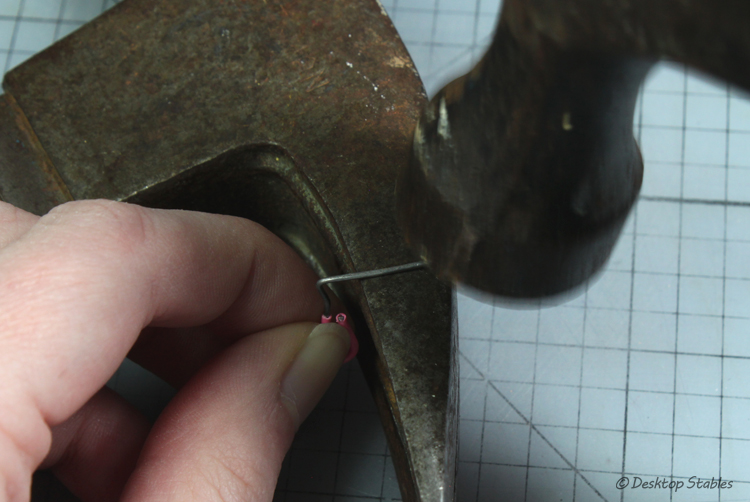
The difference is subtle but I prefer it over leaving them round:

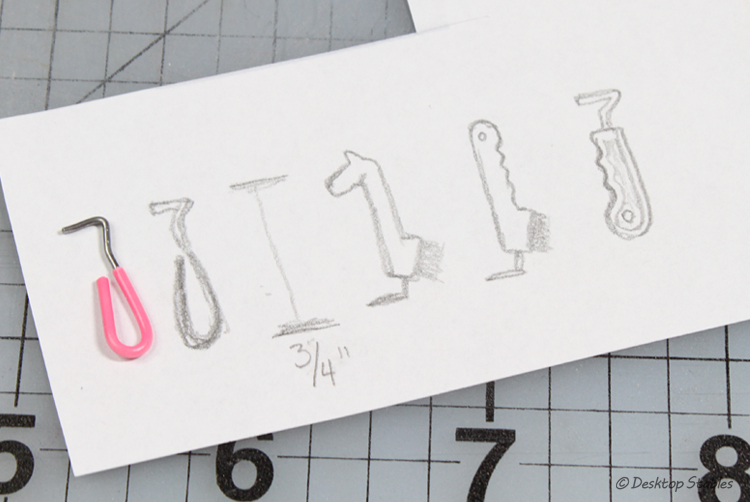
To make the other styles, I started off by sketching them out on a piece of scratch paper first. They measure about 3/4 of an inch tall, so drawing them beforehand helped me keep them the same size.
The first thing I did was make the metal picks. These were made from a long piece of wire, again, flattened with a hammer beforehand.

Using my drawings as a guide, I bent and cut down each pick to size, leaving excess to attach to the handle.

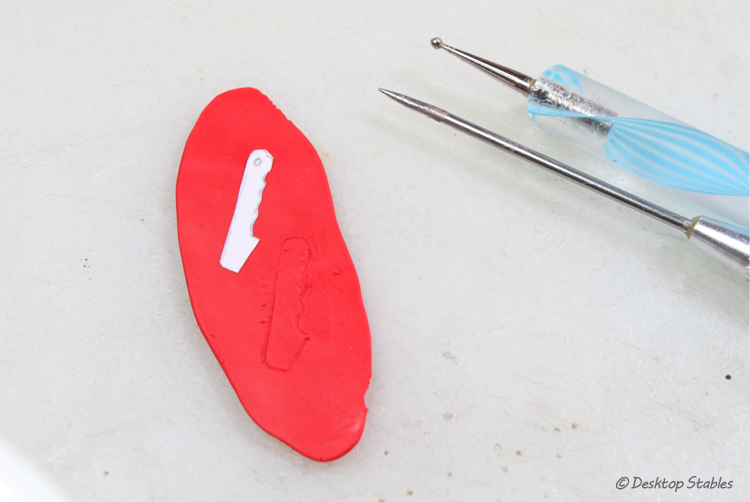
I found that cutting out my sketches and using them as a template was a lot easier than trying to draw them again. I used Sculpey polymer clay for these, rolled out thin, but not thin enough to have the wire poking through.
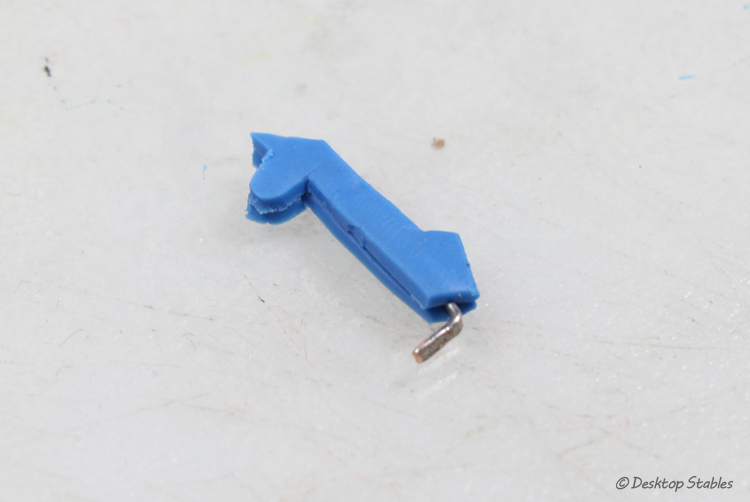
Using the template, I cut two of the horse head shape…

Then stacked them together, sandwiching the wire piece inbetween.
I used my sculpting/dotting tools to smooth out the edges, seams and add some detail.

I also made sure to add a little hollow in the back, for the bristles to go in later:

The red and purple hoof picks were made in a very similar way:
I added a small groove here before sticking the wire inside:

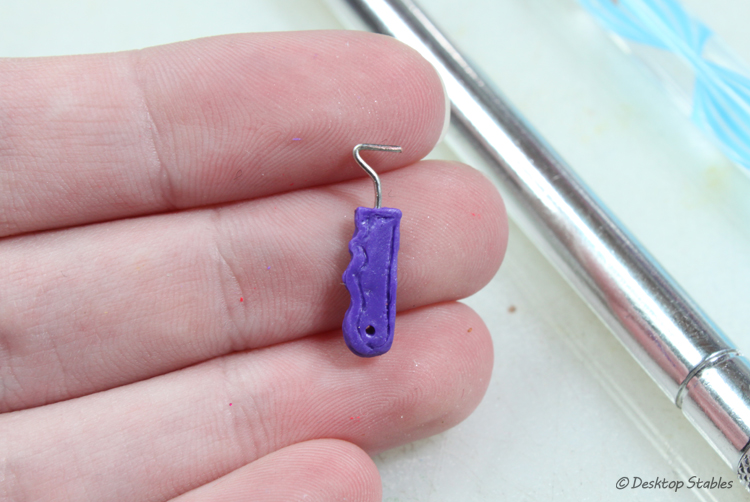
This one was lightly textured with sandpaper before baking, but it didn’t show up very well.

Here’s the purple one. I just now realized that the pick is facing the wrong way, AGH. Pay attention to reference pictures, hahaha.
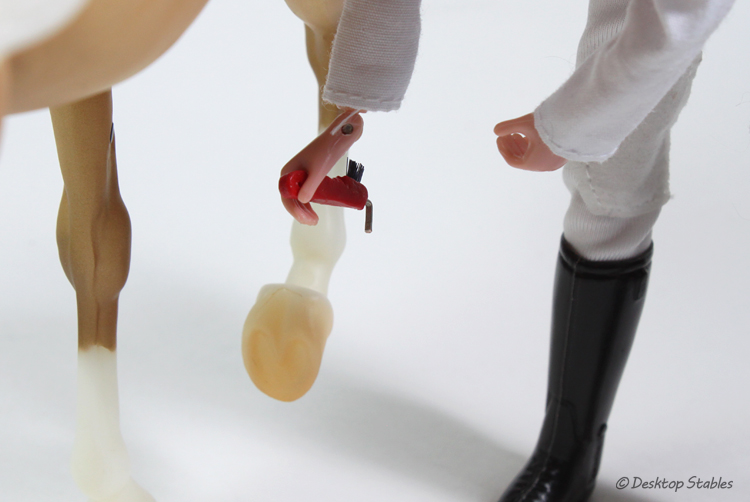
Once they had baked and cooled, I gave them a coat of matte varnish. (which still looks glossy, urgh) The red and blue needed bristles, and those were attached by filling the little hollow with glue, then gluing bits of an old paintbrush inside.

I found it easiest to pull a small bunch away from the paintbrush, cut it off (somewhere along the red line here) and glue that cut end into the hollow.

Once completely dry, cut the bristles down to size and they’re done!


These are absolutely AMAZING!! Your attention to the details is truly remarkable…they look SO real. You seem to have a “magic” touch when it comes to making the miniature items that go with our small “equines”!!
Brilliant! Love the attention to detail.
Wow! You have IMMENSE amounts of patience, great job!
Wow! These are so awesome!! Thanks for sharing. 🙂
These are awesome! I got clay for Christmas and will have to give these a try. 🙂
Nichelle, what tools are you using in the sculpting? The ones shown in the making of the red pick? Thanks!
Yep. 🙂 One’s a needle/sculpting tool, and the other is a nail art “dotting” tool.
I loved making these hoofpicks! They look so good. Thank you so much for posting these tutorials!
I made the paper clip hoof pick… it’s not too hard and it it so cool! I love it!
what glue do you use?
Usually Aleene’s Tacky glue 🙂
wow! you work really hard! everything you make is SO cool! I’m just starting to get into breyer myself,
I had my aunt make them for me, and they turned out great! Still have not put the brisels in. a little big for Schleich.
Je to velmi taske na vyrobu doma?☺🙂
Je to taske na vyrobu dom?
Jeto velmi peknè.📎📎📌📎📎📌📎📌📎📍📍📍📍📍📍📍📍📍📍📍📍📍📍📌📌📌📌📌📌📌📌📌📌📌📌📌📌📌📌📌📌📌📌📌📌📌📌📍📍📍📍📍📍📍📍📍📍📍📍📍📍📍📍📍📎📎📎📎📎📎📎📎📎📎📎📎📎📎📎📎📎📎📎📎📎📎📎📎📎📎📎📎