
Several years ago I posted a picture of some muck buckets I had made from recycled Jello cups. This isn’t exactly a tutorial for that, but since I was making a new one I figured I would get some pictures as I went along.
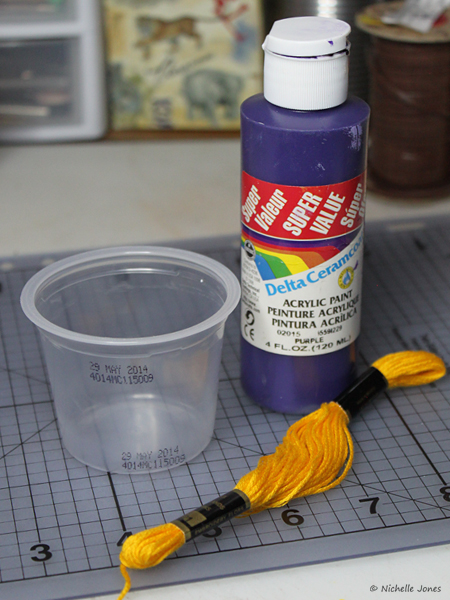
They’re really, really simple. I scratched the use-by dates off with my fingernail, then painted the inside with a couple coats of paint. Since they’re transparent, there really isn’t any need to paint the outside. I added a coat of varnish over it as well.
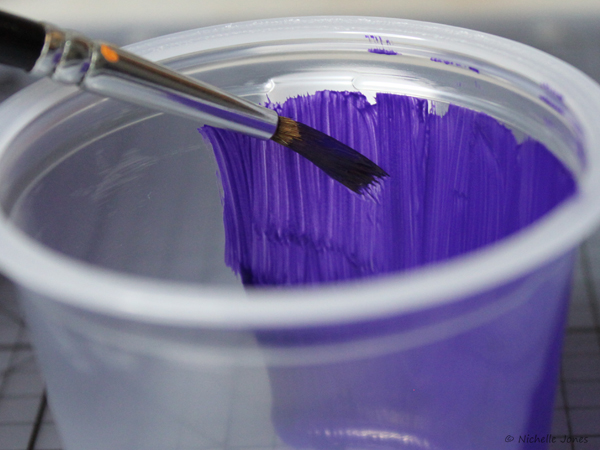

In the light, they can be a bit splotchy but honestly, my eyes don’t pick it up quite as well as my camera can. I’m not too bothered with it because you know… it’s just a bucket.

The handles were made by splitting a piece of embroidery floss in half, (my floss is made up of six individual strands) then twisting it together. I punched holes in the side with a tack and threaded the twist through with a large needle.

The fork is a plastic Breyer fork with a new (longer) handle added to it. I haven’t figured out a way to make these from scratch yet! 😛
I also got it into my head to make a hay net. To make it, I found a tutorial on how to make a real one and re-created it in miniature.

I split five strands of embroidery floss to give me ten strands altogether. You don’t have to split them- I just wanted something thinner. 🙂 My strands were really long (around 12 inches, which is plenty) but I found that keeping them long made things much easier in the long run!
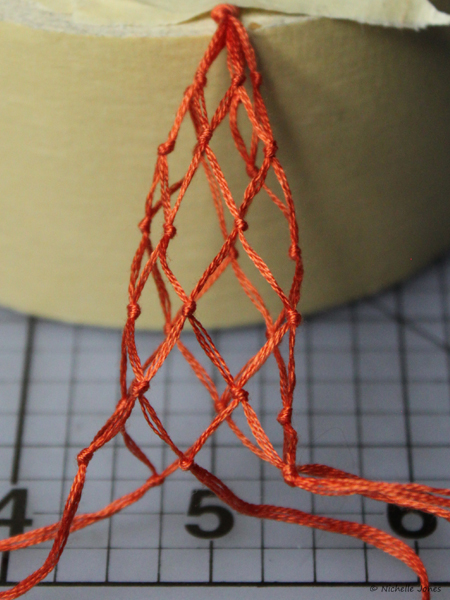 It was a lot easier to tie than I expected it to be. Some tips though… keep the end anchored to something, and don’t tie your knots too tight until you’re happy with how you’ve placed them! You could also use something like macrame cord (you can find really thin stuff on ebay… this is also great for making rope halters) instead of floss, so you could slightly melt the ends and knots to keep them from coming undone later.
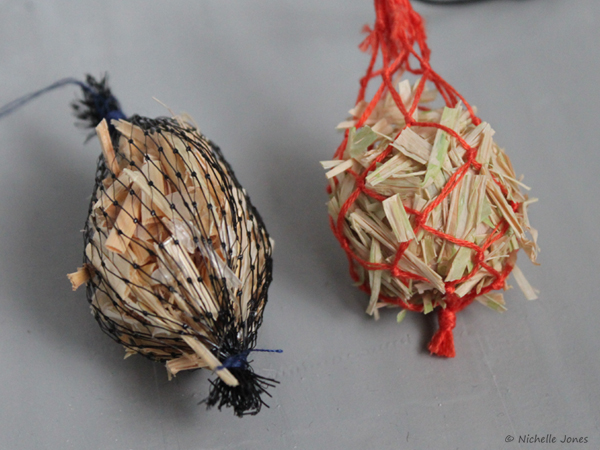
For the hay, I cut up some raffia and went over it with watered down green paint. I cut this up into a bunch of tiny pieces once it was dry.
 I covered a round wooden bead with glue and rolled it around in the pieces, then later glued more pieces to any bald spots. I don’t have any pictures of this because it was a mess and really frustrating. Once I fit it inside the net, I continued to add more pieces until it was well covered. The result…

Another way to make these would to simply stuff a mesh bag of sorts and tie off the ends. The one on the left here was made from a bag that held chocolate coins. It’s got to be ten years old at this point… I can’t believe it’s held up!
Enjoy!

Looking good! I make my haynets in a different way I think – you start off with a jumpring and go outwards, almost in a spiral!
Those buckets look amazing though, I haven’t made any with handles before…hmmm….
You could make a. Really nice pitch fork with a cheap or old comb. Hope this helps!!
love the muck buckets !
I, too, love the muck buckets! Is there no end to your creativity? * VBG* I’m SO glad you take the time to share with us! : )
I’m trying to look at everything through your eyes, model horse-wise. hahaha. After finishing an applesauce snack, I’m wondering if the container will work as well as a jello container (cuz’ I don’t have any right now).
I think I may give it a try…
You may laugh, but I ued twine to make one for my guinea pig XD he loves it! Haha 🙂
why is that actually so smart lol I used to have Guinea pigs and I wish I had known that before they passed 🥹
Rest I’m peace your Guinea pigs I bet there In heaven watching you happily 😁
Thank you thank you. I consider myself a crafter person but couldn’t for the life of me think outside of the box how to make some mini horse barn accessories for our daughter for Christmas. Thanks again 🙂
I found you from Pinterest….I was a horse owner for years, some of my best years ever! I so would love to join this hobby, but sadly do not have the $$$ for it, so I will do it vicariously through blogs like yours…:)
Wow! I am totally going to try this out! They will look so nice in my breyer horse barn. 🐴
Cool and awesome and I just am speech less
the muck buckets are great I will make some
Hiiieiut
❤️🐎
love the hay net
I was wondering if you could put some of your accessories up for sale so if any of us like me lol don’t have the resources we still get one?