
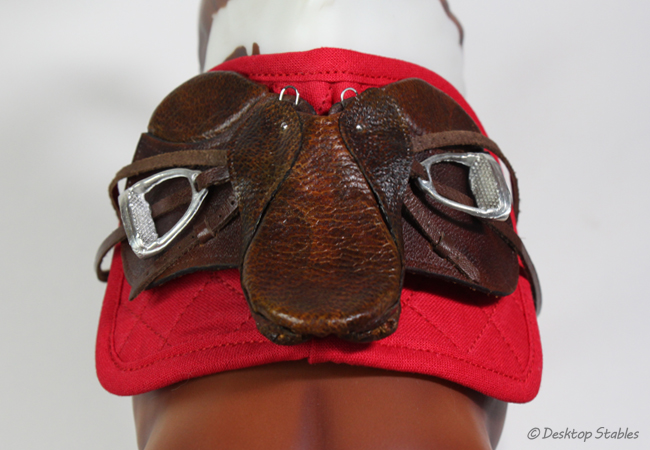
Last week I attempted to make another English saddle pad:

The end result was ok… better than older attempts I think, but it has plenty of problems. Since then I’ve been repeatedly sewing more, trying to work out those problems. It’s driving me nuts, and has almost become an obsession. (which explains the quiet over the past week… that and long, busy days at work…)

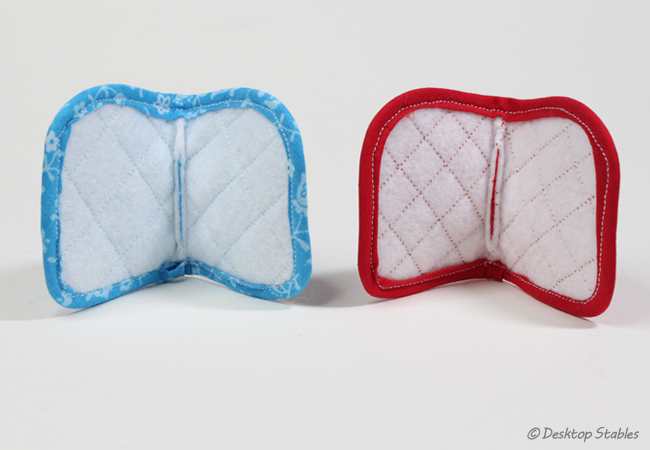
The biggest problem I have is stitching the bias binding around the edges. I’m not properly sewing this on like you normally would with bias. Instead I’m trying to sandwich all the pieces together. (if that makes sense…) And it works… sometimes. The first red one worked out ok, even though the stitching didn’t catch the binding in some places. The purple is just a spectacular fail on so many levels, but it was also an attempt at sewing the binding on with the underside unfolded, in order to have more room to catch it. The blue is better, but most of the uneven trim has been cut away, giving it a neater appearance than it originally was.
Another big problem I keep running into is sewing the binding together, without actually going through the pad itself. This results in lovely holes around the edges and is incredibly frustrating.

I did end up trying to sew the bias on normally, sewing along the top before folding it over and sewing over the entire thing again. The good thing about this is that it doesn’t create those holes, and is much more secure.

The downside is that I’m still failing to catch the underside, and it’s a lot more time consuming.

I think the main issue with this is the scale. The binding I’m using is fiddly to work with, and trying to get everything lined up nicely on a sewing machine is very difficult. Pins don’t really help… they usually get in the way and make things worse. The only way I could think of to get these sewn better was to sew them by hand, which I really did NOT want to do for a number of reasons.
That did create a lightbulb moment though- instead of fighting to keep everything in place while sewing, I decided to try basting everything in place by hand first, then go over it with the machine.
So far it’s worked… the big stitches hold everything together and create a guide to sew along with the machine. Once that’s done, they can be easily taken out with a seam ripper.
 The stitching is still not “perfect” though,
 … and I don’t know if I’ll ever get it to be perfect either.
 ![]()

But the struggle to get the @$!& binding in place is sort of resolved, hooray! I can only hope that the size is ok…

Another good thing that’s come out of this is that I now have the tools to quickly make lots of bias tape in all sorts of colors:
 This makes me SO happy because the way I was making bias before was incredibly time consuming. I’m hoping to get some more blankets made too… the bias and sewing created some issues but now I’m feeling inspired and ready to try again!

I really like them! I’m starting to sew some things on my machine too. I’ve done pony pouches and a bareback pad and I know the frustration. Good luck and hopefully I’ll see one in etsy some time soon?
There’s also a temporary tacky glue that quilters use that you can use to hold the edging in place before you sew it.
Nichelle, is your bias tape 1/4″ or are you making it narrower?
It’s 1/2″, but when folded it’s 1/4″ 🙂
Found a video and now I understand! You can make 1/4 inch with the tool and then fold it again because you need a double fold bias tape. Fun!
So you’re using 1/4″. That’s helpful:) Thank you!
Are you going to offer these English saddle pads in your Etsy shop? ( I check it out daily =))
I hope to, eventually 🙂
Quick question: What do you use to glue the ribbon on your halters together? Would super glue or hot glue work better?
I would avoid both super glue and hot glue for ribbon… I always used Aleene’s tacky glue with nice results, but have more recently switched to Fabri-Tac, which I’m liking a lot. Hope this helps!