
It’s been ages since I last posted a tutorial on here. I hope you like this one! Lately I’ve been trying to put together a grooming kit of sorts, and one of the items for that set was the tote to carry it all around in. I’d probably prefer one of the plastic ones if I had a horse of my own, but this one turned out so cute that I’m eager to share it with you. 🙂

You’re going to need the PATTERN first and foremost. (if you need a format other than a PDF please let me know!)
Also…
- Fabric of choice (cotton works best in this scale) and 1/8 in ribbon for handles
- Iron – optional but it will make this project A LOT easier. You can also substitute an old flat iron if you’d like 😉
- Needle + thread, glue (fabric glue works best) and paint (also optional)
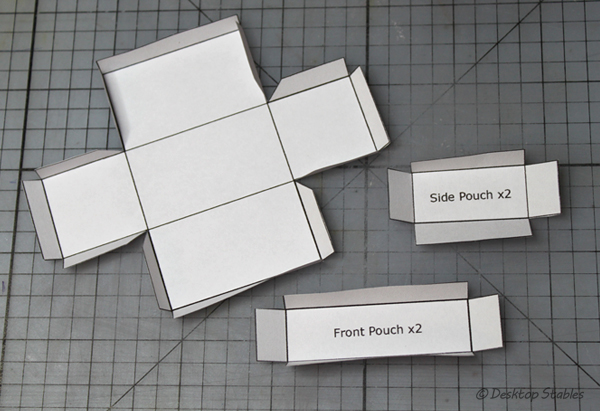
First, you’re going to want to cut out the pattern pieces and fold all the grey shaded tabs inward, like so.
Transfer the pattern to the wrong side of your fabric of choice. One way to do this is to trace around the shape without the tabs, then fold those down and trace around them. Or, you can trace around the entire piece, then free-sketch the tabs back into place. Clear as mud?
You want the end result to look like this:
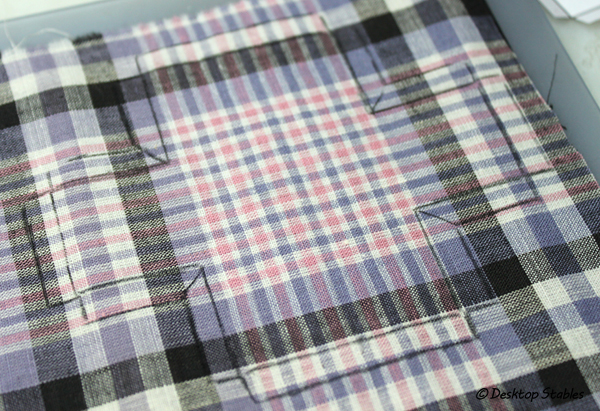
Cut out all your pieces. (remember to cut the diagonal lines in the corners!)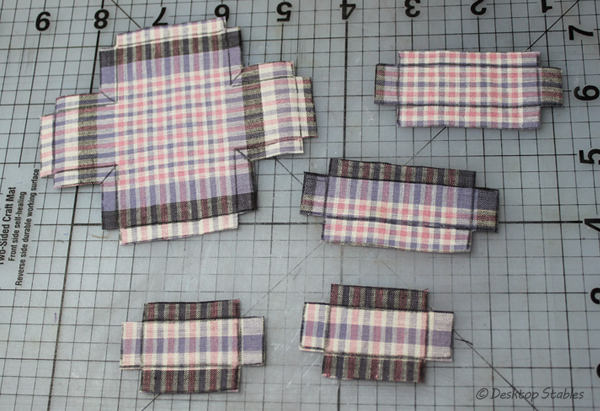
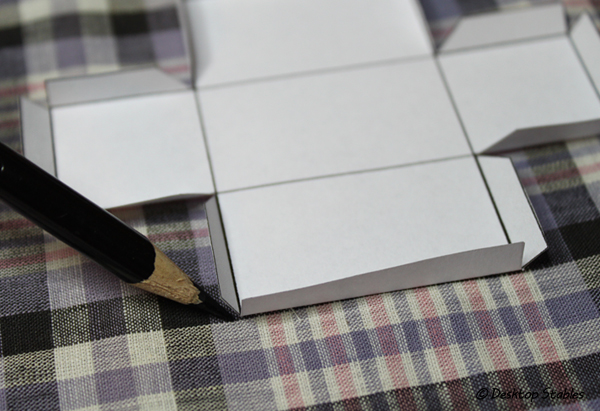
With an iron, fold and flatten the tabs inward. They don’t have to lay flat, you just want that sharp crease there. Fold in the sides of the main piece as well, to form the bottom of the bag.
On the side and front pieces, ONLY fold down the top and bottom tabs, leaving the ends flat.

Now it’s time to start gluing tabs down. I like to use Fabri-Tac. It holds well and dries pretty quickly.
On the front and side pieces, glue the top and bottom tabs down. On the larger piece, glue down the end tabs on both the short and long sides.
Basically this is a quick way to “hem” the edges, so when the bag is folded together, the raw edges are hidden.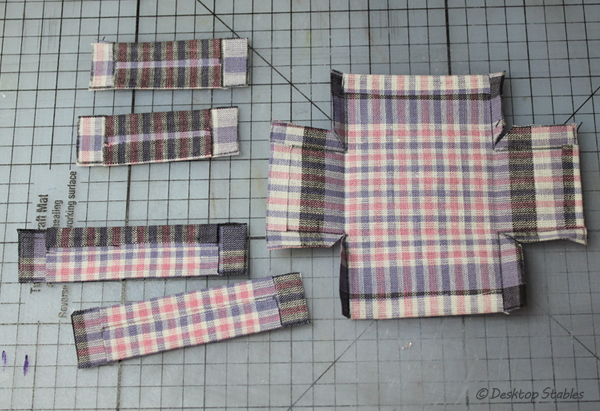
To attach the pockets/pouches on the outside, first fold in one of the sides of the bag: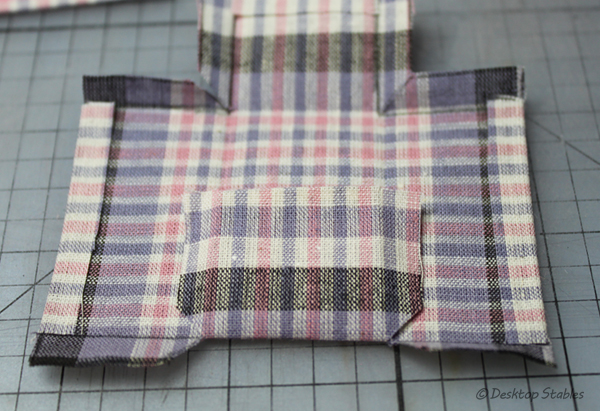
Run a thin line of glue along the bottom edge of the side piece, then line it up with the folded edge, and glue place.
Repeat for all four sides, and you should have something that looks like this: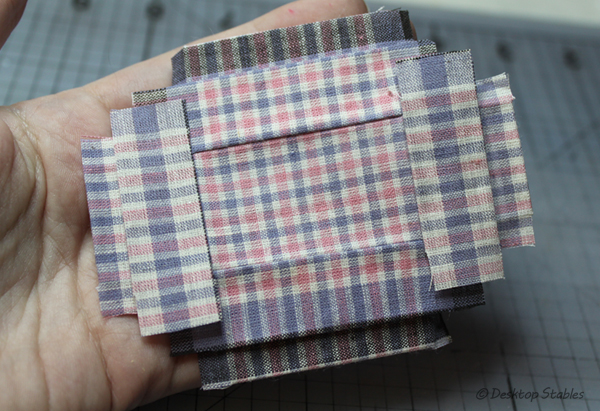
Fold the overlapping edges over, like this: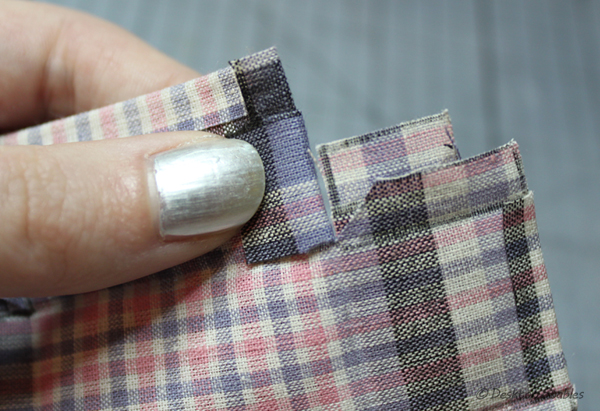
Here’s a view from the other side:
Iron these down to help set the folds. Next, you’re going to put the two folded edges together:

This will form one corner of the bag. I like to glue these in place. Repeat for all four corners.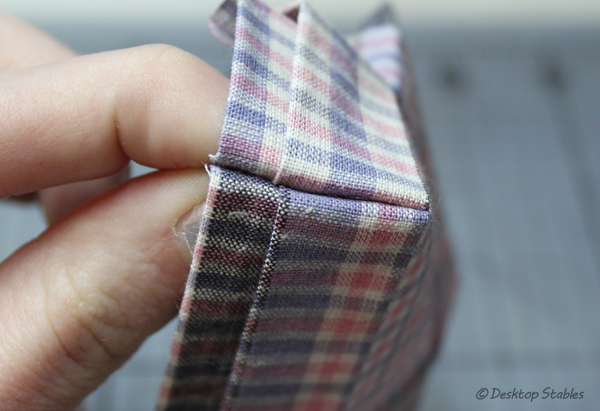
Yay, it’s looking like a bag now! Take a break for a cup of tea or something. 🙂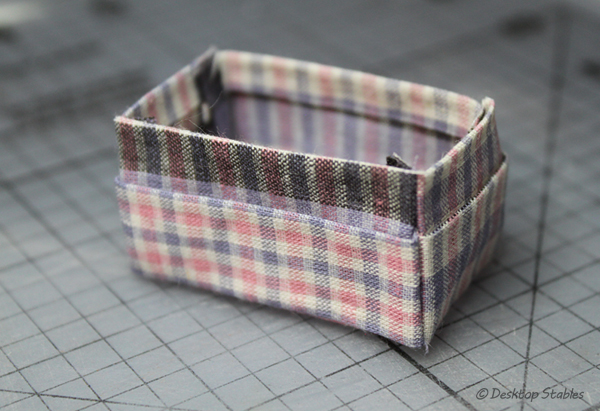
If you’d like, you can leave the bag as-is, but I like sewing it up for added strength. I do this by gently turning the whole thing inside out, then sewing up and down the sides:
Here I’ve trimmed off the excess, and covered the edges and knots with a generous amount of Fray Check:
Once that’s done, turn it right side out and iron all the corners/folds once again. I also chose to fold the entire thing in half and ironed it down, to give it some creases in the middle.
You can add trim around the edges if you’d like. I brushed a thin line of black paint around the edges instead, and covered that with varnish.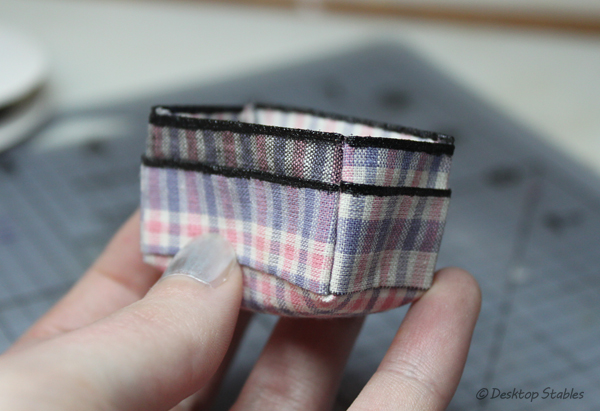
Add a couple pieces of ribbon for handles, a tiny logo if you’d like (there’s a couple on the pattern or you can make your own) and you’re done!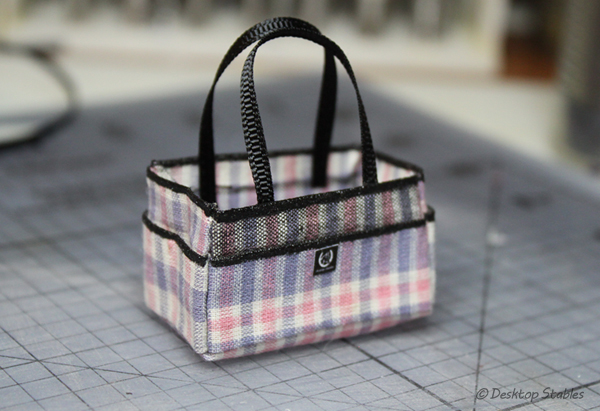
Have fun! Now to make all the tiny things to stick inside it…

Reblogged this on Ethereal Equines and commented:
New tutorial from Nichelle at Desktop Stables!
that turned out super cute – very detailed tutorial too!
This. Is. Awesome. It’s so cute! And perfect! I like the idea of gluing seams in this scale, I would have sewn them and got very frustrated. Thanks for the tip!
(Did I say I love it? 😍☺️)
Absolutely gorgeous work Nichelle!! Thanks so much for this tutorial! I made a pink one with crowns on it👑
how do i get the pattern
I love it but I got lost with all the pocket glueing…
That is so cool!! Thank you so much for sharing! I’m definitely going to try this. 🙂
Thank you so much for this cute tutorial *-*
I´ve done 2 already 😀
Thank you so much for the tutorial! I’ve made two already, one flannel plaid and one royal blue cotton. I found another great tutorial about how to make brushes and grooming supplies. Its on SCS_Tutorials on instagram. You can view instagram on a webpage and I highly recommend checking it out!
Making it right now! I think it’s SO cute!
Dear Nichelle, THANK YOU SO MUCH!!! This is my first time commenting but I think your stuff is amazing!!! I’ve made two of these :). Keep up the good work!
Could you post how to make the tools?
I have tutorials on brushes and hoofpicks under the “Tutorials” tab at the top of the page ^_^
Love your nails!!!!
Haha thanks!! 😀
Waar kan ik de patronen vinden?
The pattern is linked in the post, but here’s a direct link: https://desktopstables.files.wordpress.com/2015/08/fabricgroomingtote.pdf
Haha! I have tried this 2 times! They were both uneven! I am going to try it again tonight tho!
Finally! It turned out nice!
And yes, i am ColtsAndFilliesTack on etsy com here is a link: https://www.etsy.com/shop/ColtsAndFilliesTack?ref=shop_sugg