
Recently I was inspired to make hay bags for my models, and have turned it into a tutorial for you all.

This time I included Traditional, Classic and Schleich sizes on the pattern. 🙂

You will need:
- The Pattern – can’t open a PDF? Download this – it’s free!
- Fabric (I use cotton as it’s easy to work with) + matching thread
- 1/8 ribbon, jump rings and hook (etched or bent by hand)
- Acrylic paint – this will be the “binding” around the edge
- Fray Check, fabric glue (I use Fabri-Tac)
- Iron – a flat iron can work nicely! 😉
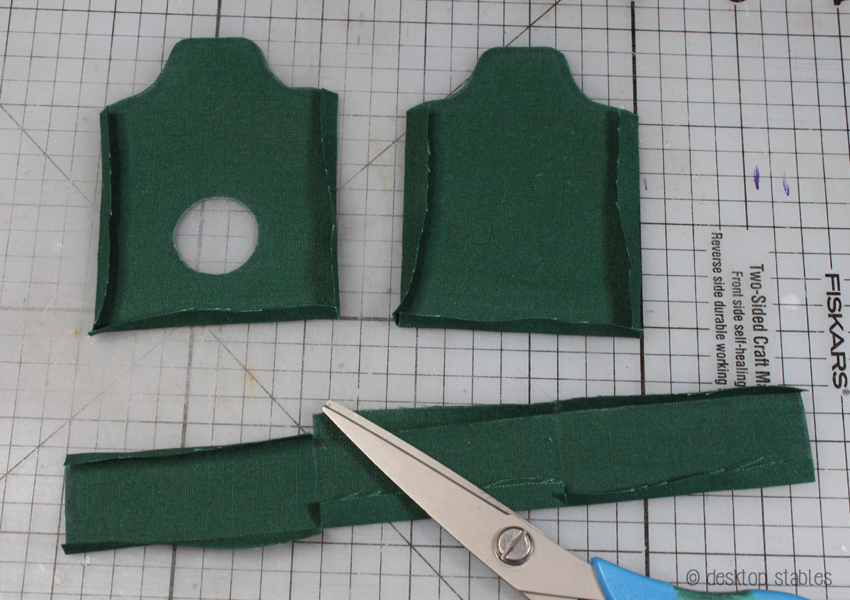
The first step is to iron your fabric to remove all wrinkles. Cut out your pattern and trace it onto the wrong side of your fabric. The pattern includes a seam allowance – you can add this in free hand or bend back the pattern tabs, then trace again.

With Fray Check, go over the lines of the round opening, top edges of the bag and short edges of the long piece, then let dry completely. This will soak through the fabric so make sure you have something underneath! Fray Check can darken some fabrics, so it would be a good idea to test a scrap piece first.

Cut out your pieces, then fold all tabs inward and iron down. The long piece’s pattern is divided into three sections. (marked with dotted lines) Fold and iron these down, then make small cuts in the tab on each side.
Line up the top edge of the long piece with the edge of a bag piece, then glue the tabs together. I’m not using a lot of glue here – just enough to hold it in place.

Repeat with the opposite side, then glue the middle section together.

Repeat with the second bag piece. You should have an inside out hay bag when you’re finished.
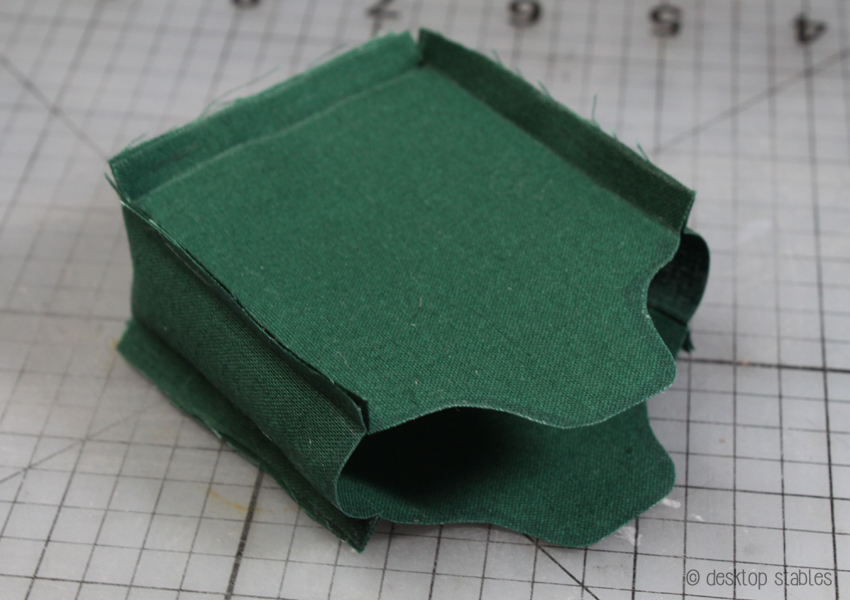
Sew the bag together along the folds. You could skip this step altogether (depending on how much glue you used) but I want a little more strength here.

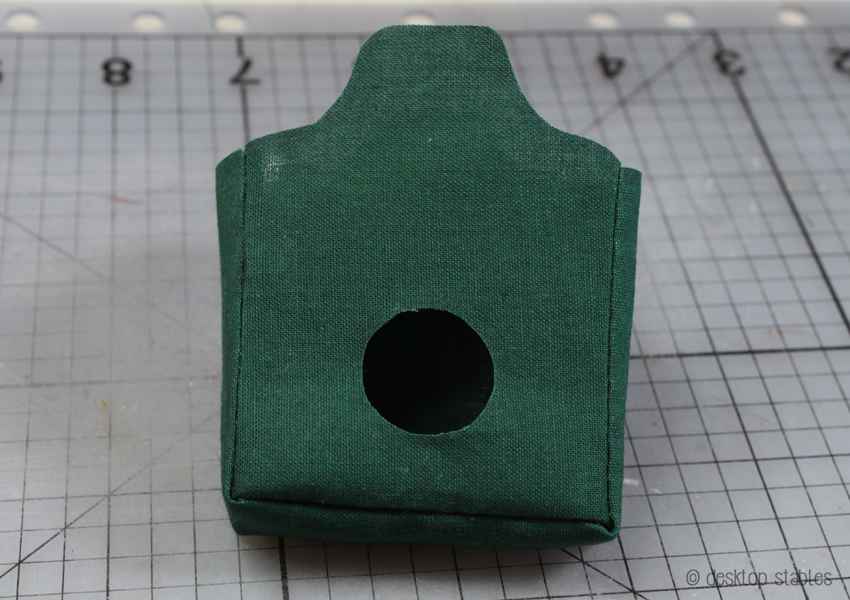
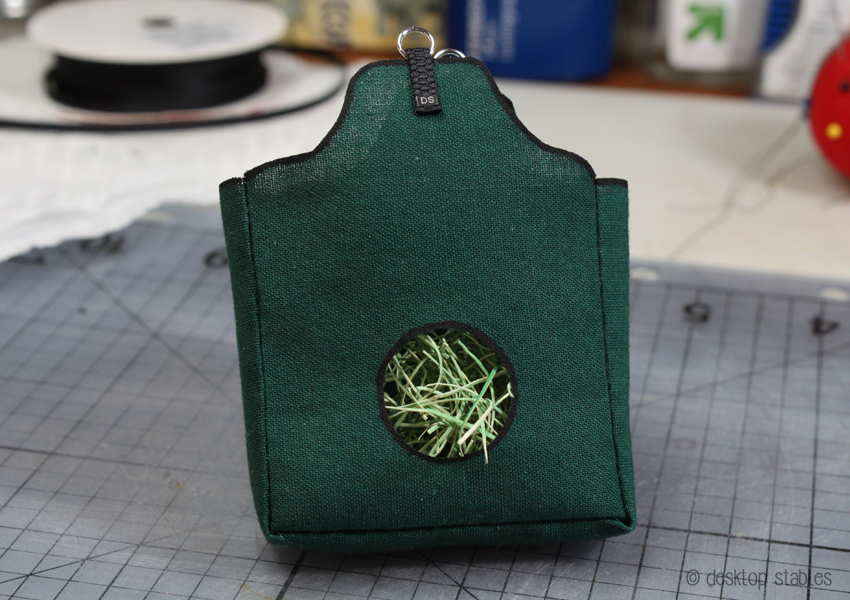
Trim off the excess, then flip the bag right side out. Press the edges with an iron (or your fingers!) to shape it.
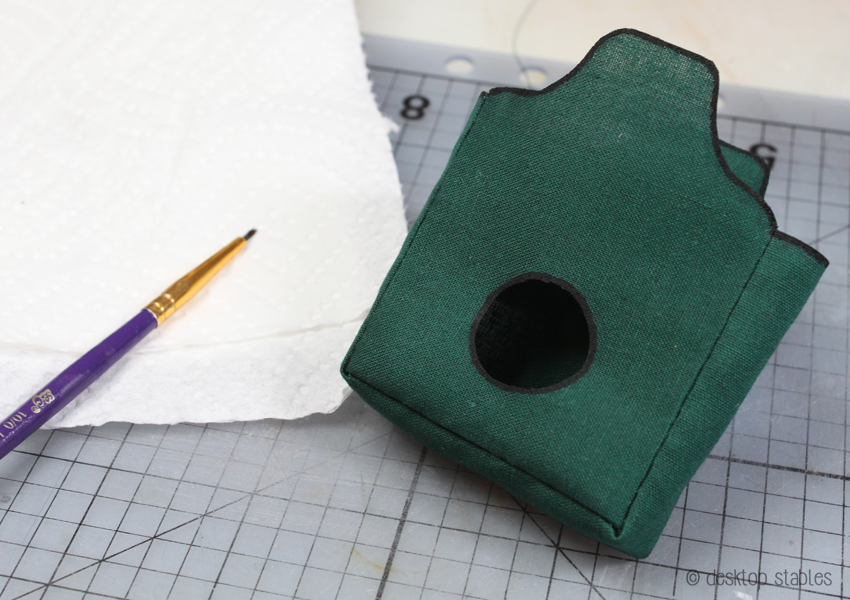
Add paint around the top edges and opening for faux binding. Remember to paint the inside edges too!
Cut three pieces of ribbon about an inch long. On two of the pieces, fold a small amount over and glue down.
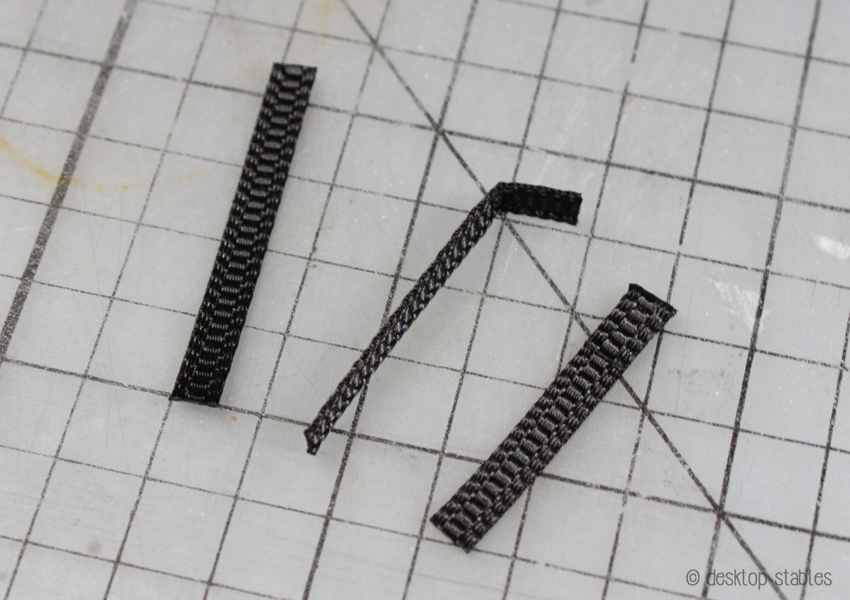
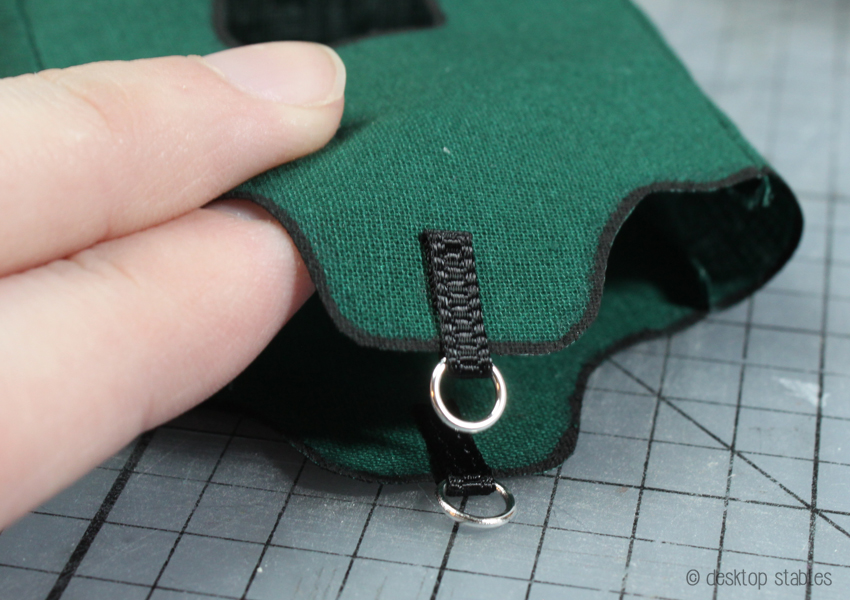
Fold these in half and thread on a jump ring. With the folded side on the outside of the bag, glue over the top edge.
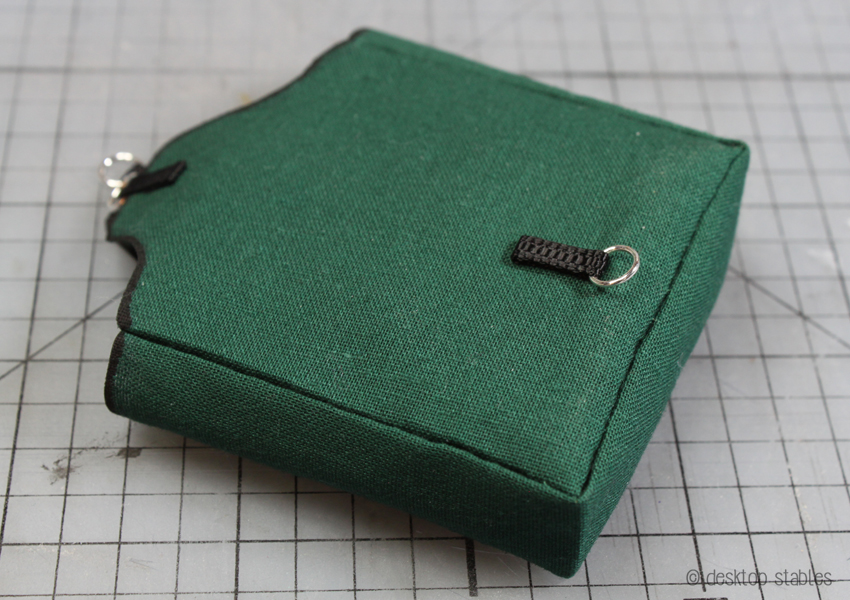
With the third ribbon piece, fold over one end, add a jump ring and glue in place. Fold and glue the excess, then glue to the back of the bag. On real hay bags, this ring is to add extra support to the bag when it’s tied up. On the model ones it’s just an extra detail, but it could be used if you wanted to. 🙂
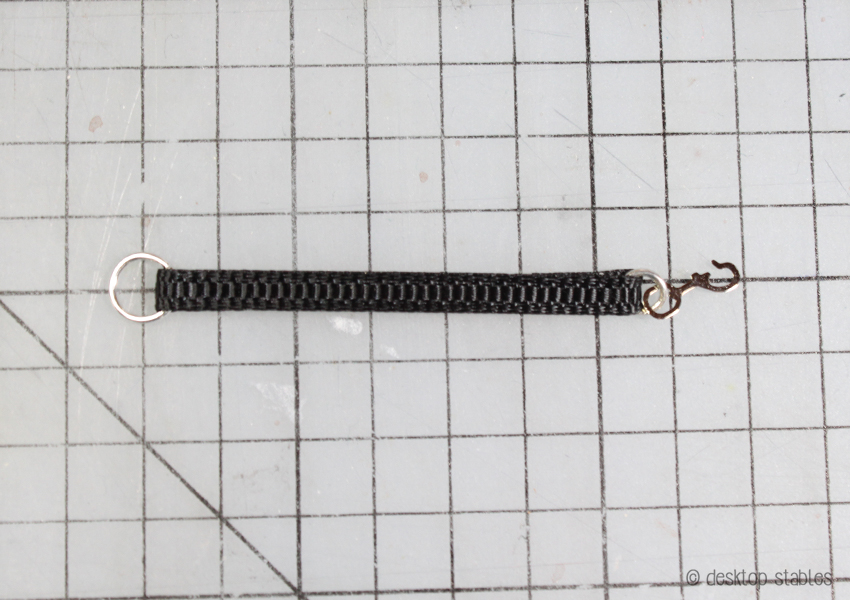
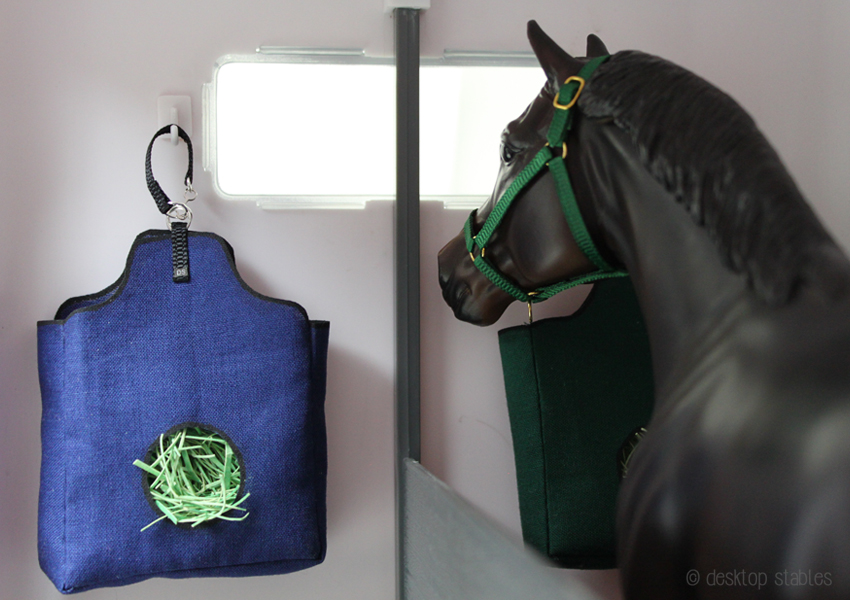
Your bag is finished! To make a simple hanging strap, glue a jump ring to one end of a piece of ribbon, and a hook to the other. (this one is from Rio Rondo but you could bend one out of wire if you’d like)
Fill the bag with hay (mine is a painted manila folder, cut into a bazillion tiny pieces) and hang someplace for the ponies to enjoy. 🙂
The smaller ones are made the same way.

For the Schleich size, I saturated a piece of 1/8 ribbon in Fray Check, then split it in half to get a thinner piece.

Hope you enjoy!

I absolutely LOVE your tutorials. It’s fascinating to see what goes into building these minis.
Great tutorial! And thankyou also for adding Schleich scale as it means I don’t have to resize it myself and hope I got it right!
Amazing tutorial! Thank you soooo soooo much for doing the Schleich size, as the bags won’t be way to huge then! Thanks again!
P.S. When did you get a Schleich?
I have a handful of Schleich models, but I don’t collect them. 🙂 This one came with a box of Breyer stuff I picked up not too long ago.
Cool! You don’t happen to have the retired Appaloosa stallion, do you???
Nope, don’t have that one 🙂
Okay. Which ones do you have? (Do you know?)
Ooh yay Schleich size! That’s funny, I collect Schleich but I have a handful of Breyers(three) Some days I love being able to just go outside and cut some real hay into smaller pieces and use it.
Where do you get your ribbon? Or what is it called? I keep trying to find something like it.
I use grosgrain ribbon. It can be found in most craft stores, but I’ve also purchased it online from hairbowcenter.com 🙂
Oooohhhh! Super nice craft, and the Classics horse used to model is the same as one of my models! (Willow)