
Tools & supplies post can be found here
Next up in this “sewing series” of posts – quilting!
I stitch all of my english saddle pads on my sewing machine. Yes, pre-quilted fabric does exist. There is a really nice in-scale material that a lot of tack makers use, however, I’ve only seen it for sale from overseas websites, and it’s quite expensive to have shipped to me. Also, you are limited to what colors it comes in, unless you want to get into dyeing fabric yourself. As far as I know prints don’t exist? I could be wrong of course.
So the main reason I quilt it all myself is for the freedom to use whatever color I want, or whatever print I want. Also, I wanted my work to look different from what everyone else was using. 😉
This post will show you how I quilt both a large and small square pattern. It’s really simple, and once you get the hang of it you’ll blaze through without thinking. 🙂

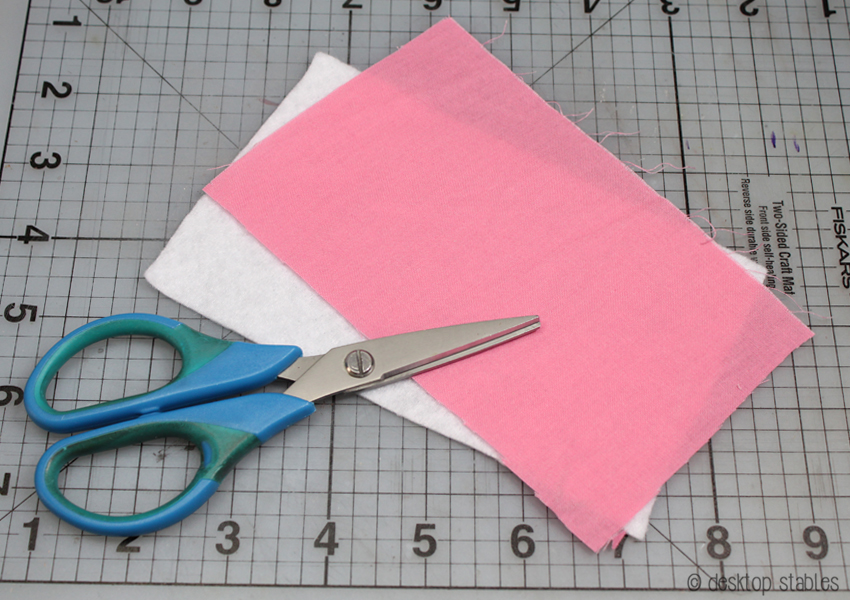
I make my English pads from a layer of felt and a layer of cotton, but you can use whatever material you’re comfortable with.
All of my quilting is done before cutting out the shape of the pad. I do this because more often than not, the layers will shift as you sew them together. This could really mess up the shape of my pad if I cut it out beforehand.
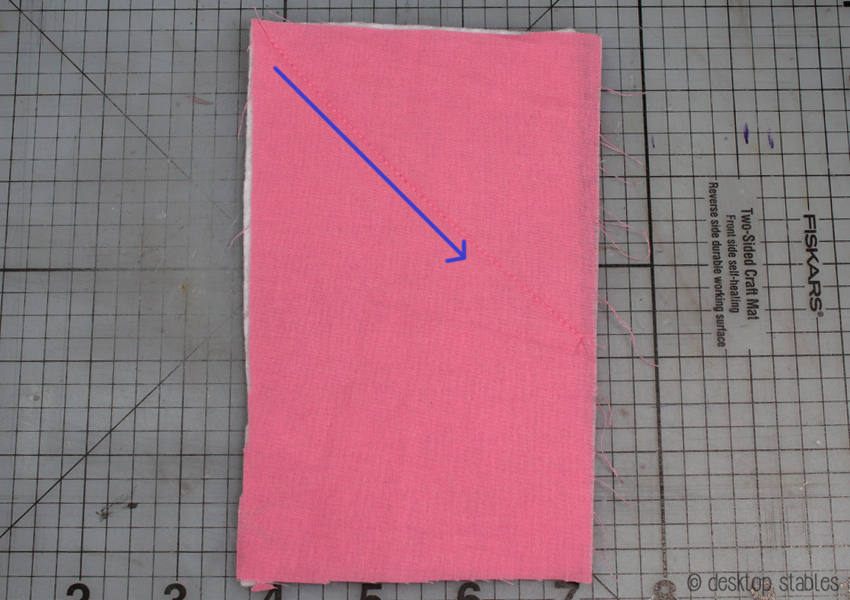
To start, sew a diagonal line starting at one top corner. If you like, you can draw this in with chalk and a ruler. (it will not go corner to corner unless your fabric piece is a perfect square)
Take your time with this line – this will be your guide for the remaining stitches.
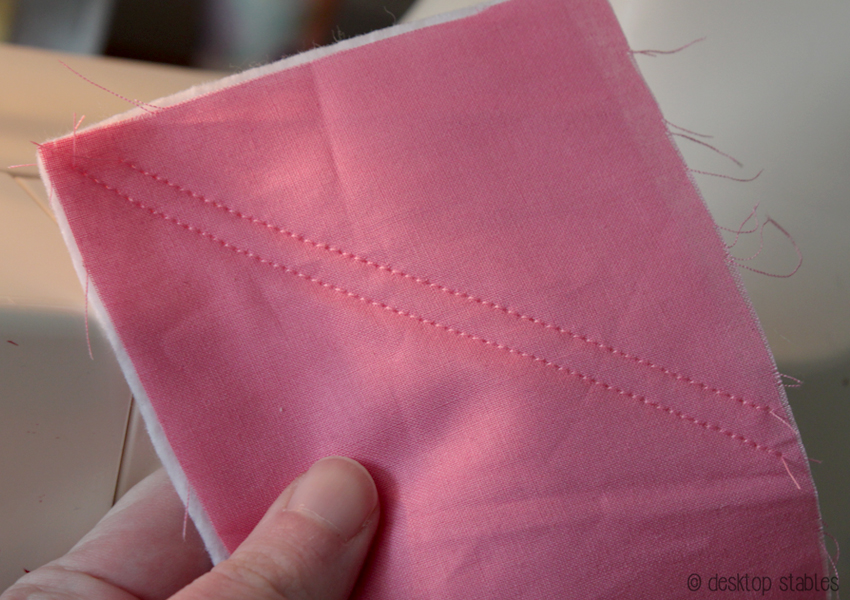
Instead of using measurements, I use the foot of my sewing machine to determine how far apart to keep my stitching.
Here’s how I position the fabric for the small quilted pattern. I want my “guide line” to be in the center of the left side of the foot.

When sewing the second line, I keep my eyes on that guide line to make sure it remains in the center.
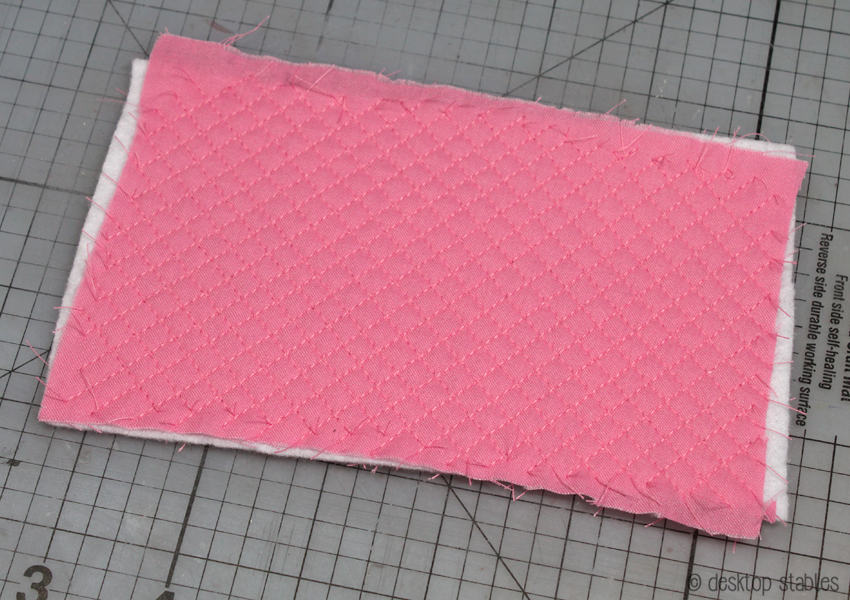
Success!
This process is repeated over and over again, until the entire piece is covered with diagonal lines.

Next, you’re going to do the same exact thing, but in the other direction. Starting at the opposite top corner, sew another diagonal guide line. Take your time with this one too. You want this line to be straight and perpendicular to the previous stitching.
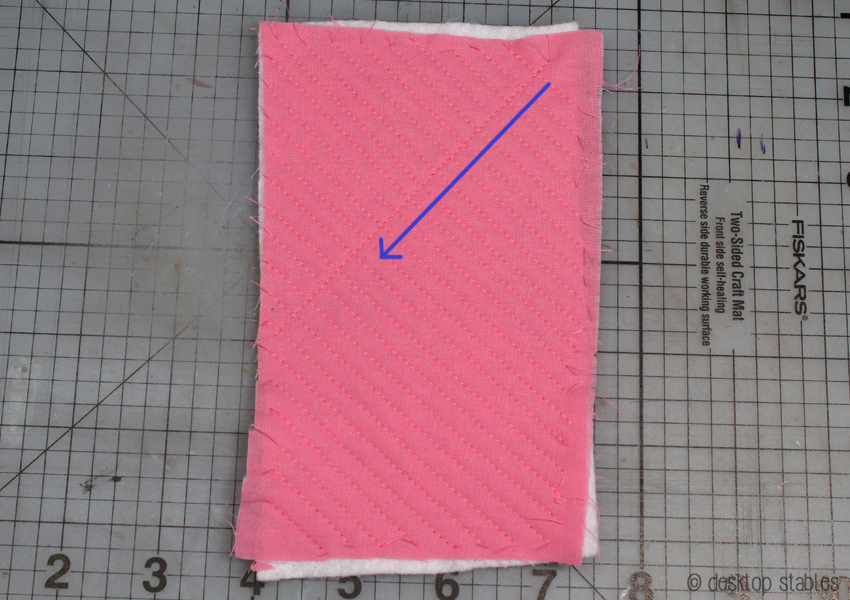
Continue just as before, until the entire piece is covered. This piece is ready to be cut now.
The larger square pattern is created the same exact way. The only difference is the distance between the stitching. Just like before, I use the sewing machine’s foot to measure the distance. In this case, I try to keep the edge of the foot around 1/8 of an inch from the guide line.

Completed!

Don’t be discouraged if your squares aren’t quite square! My earlier pads never were. It’s taken a lot of practice to get my quilting consistent. (and sometimes it still isn’t, shhh!)

If you’re having trouble, it’s perfectly fine to draw in your quilting lines beforehand, and use those as a guide for sewing. You can experiment with different sizes and patterns too. After all, real saddle pads come in many different styles!

Thanks! I’ve always had trouble getting quilting lined up… this should help me!😄