
For the longest time I’ve been wanting to learn how to make better barrel or gaming reins. The easiest way to make them is with a regular three stand braid, and that looks nice enough:

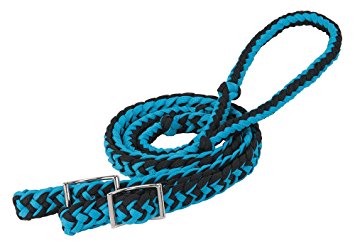
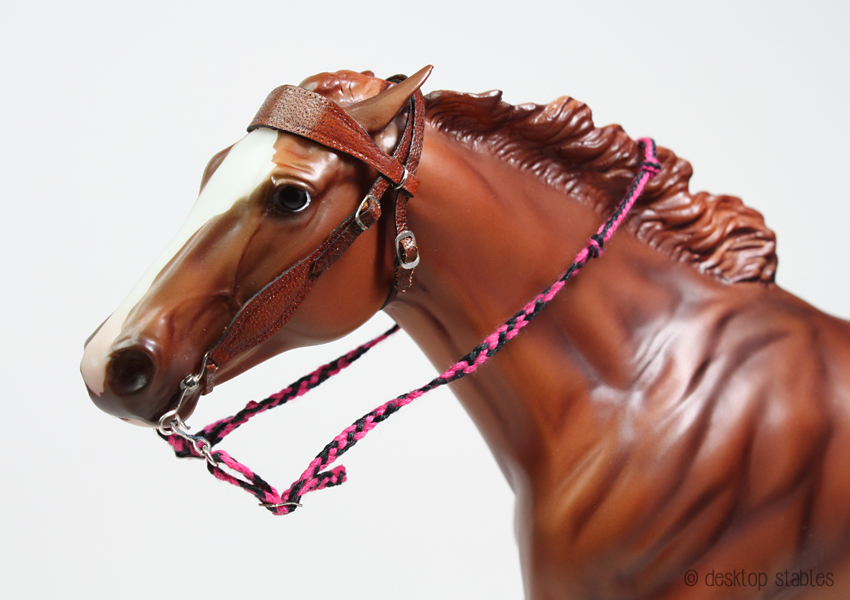
But I wanted to take it further and recreate this in miniature:
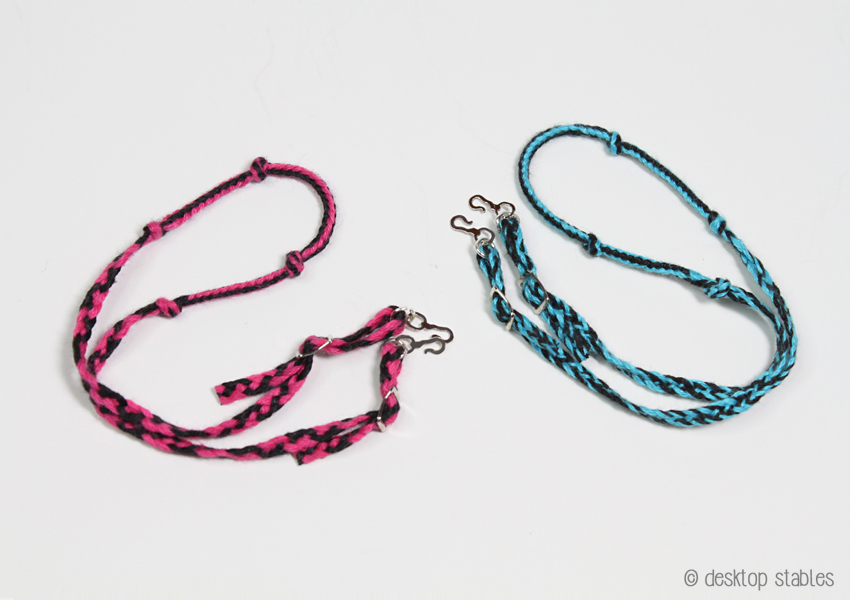
I did some searching on different paracord braid styles, found two tutorials that I thought would work, then made these:
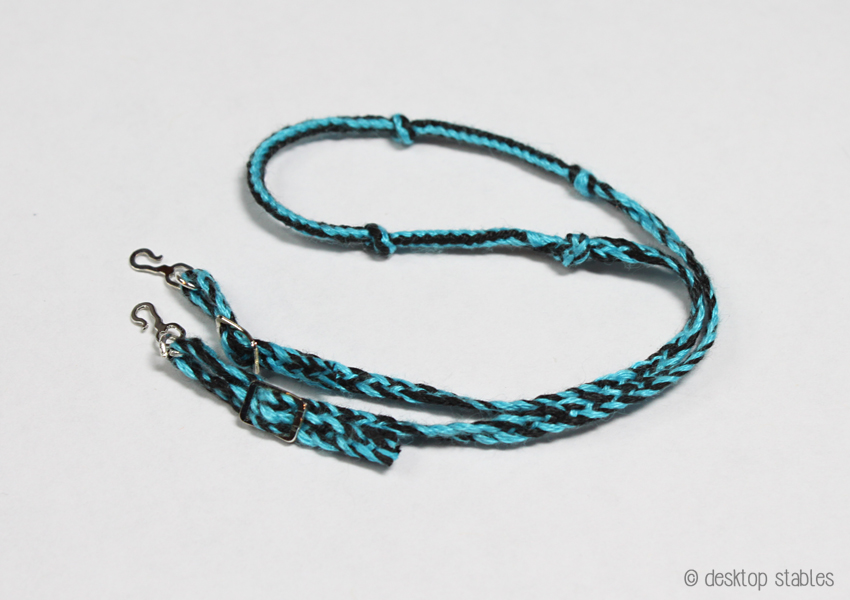
I really love the result, and wanted to share how I made them with you. Keep in mind that this is not an easy complete-in-20-minutes type of project. It may take hours, and will require a lot of patience. While the braid patterns are quite simple, the tricky part is keeping the strands (in this case, 8 strands made from split embroidery floss) in order, which is hard to do, especially in miniature!
You will need:
- Embroidery floss in two colors (you can use more than one if you’d like but two will simplify things)
- Two 1/8″ buckles
- Two hooks (to attach to bit shanks)
- Two small jump rings
- Fray Check
My hardware is from Rio Rondo, but you can definitely make this yourself from wire.
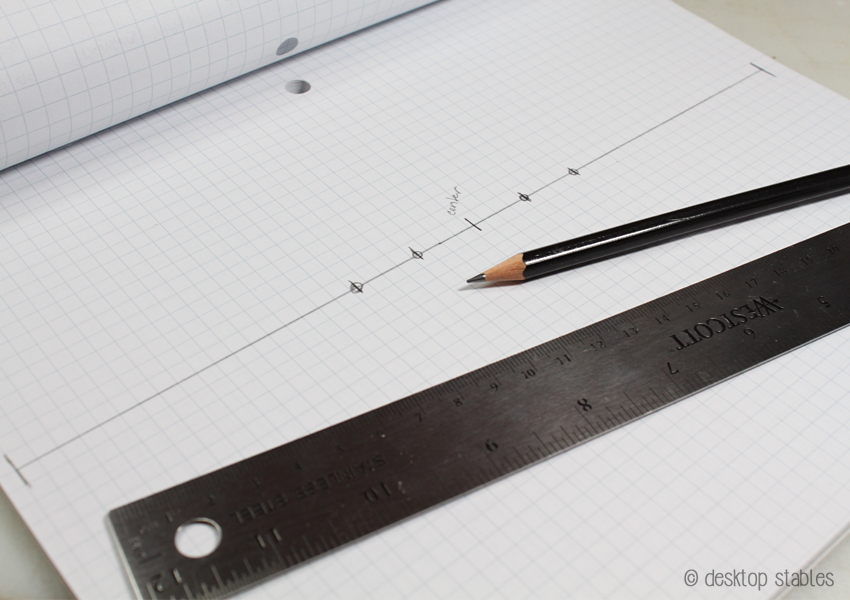
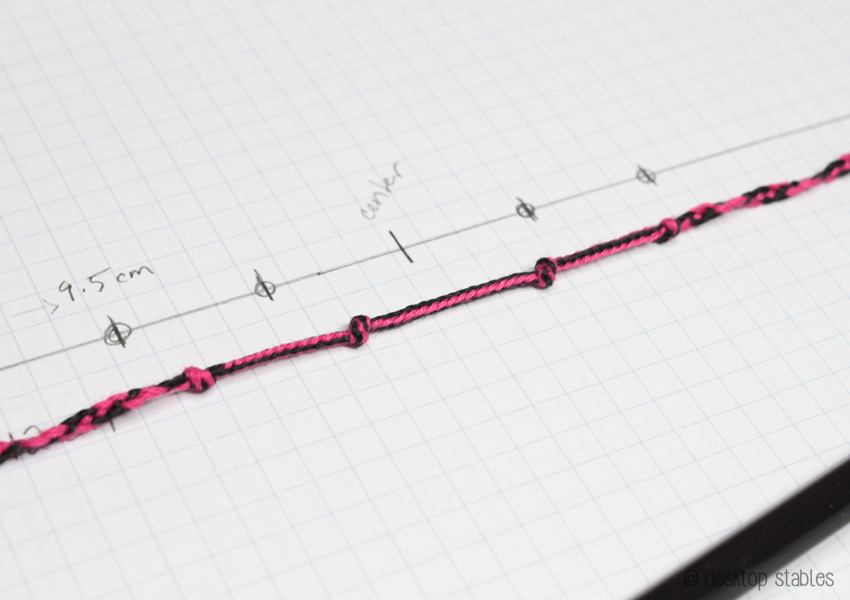
A common length for full-size barrel reins is 8 ft. In 1:9 scale, this is around 10 1/2 inches. To start, draw a 10 1/2 inch line on a piece of paper. Make a center mark at 5 1/4 inches. From the center, add two more marks at 2 cm and 4 cm. Repeat on the other side.
You will use this drawing for reference when you adjust your finished reins.
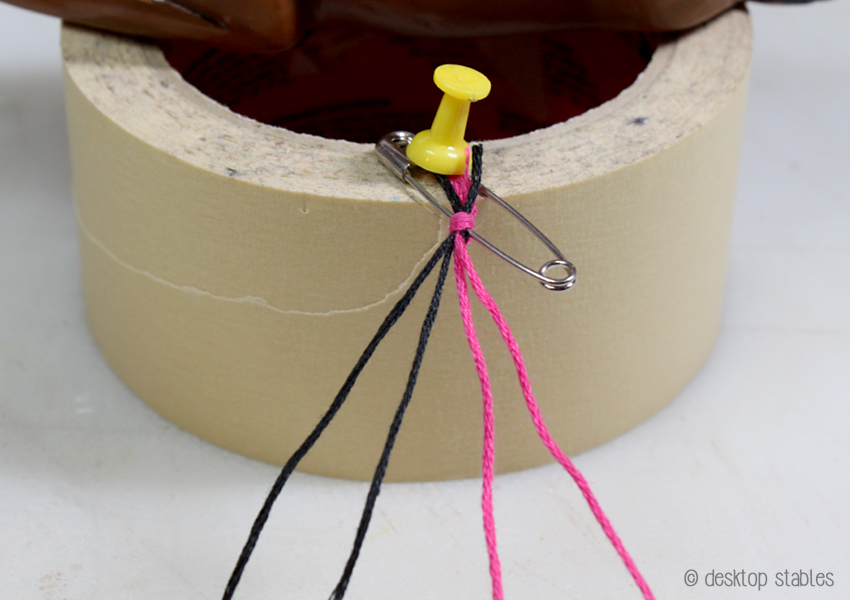
Because it’s better to have more than not enough, measure a 12 inch piece of embroidery floss, then double it to make 24 inches. Cut two of these in one color, then two in the second.
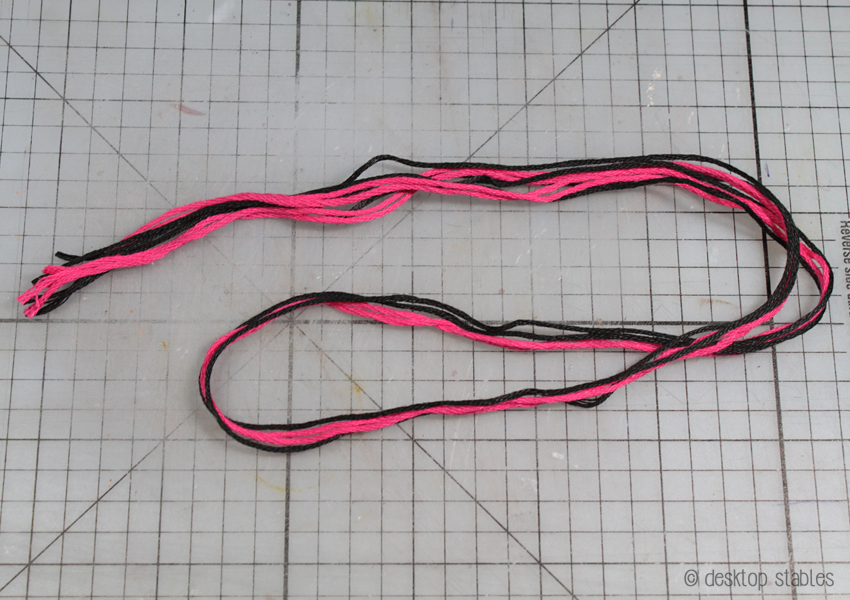
Knot together at the top, then separate the four strands. In my first attempt, I split each strand into two, so I had four strands with two colors in each – if that makes sense?
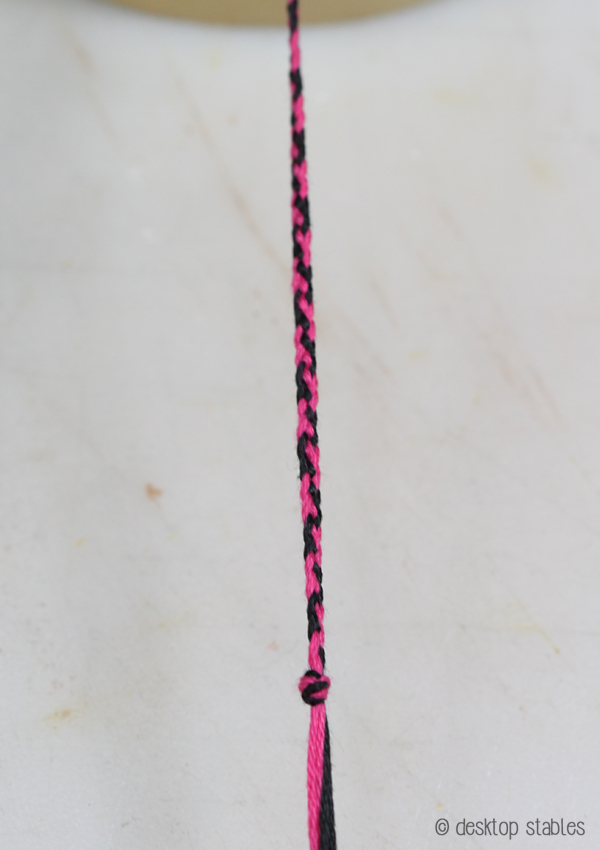
The first braid we’ll be doing is a four strand flat braid. Rather than attempt to re-explain that, HERE is a link to the tutorial I followed.
This braid is pretty easy and quick to do once you get the pattern down. Continue braiding for about 12 cm, then tie a single overhand knot.
Next, we’re going to do an 8 strand round braid. Separate your four strands, then split each one in half. For this specific color pattern, keep all of one color on the right side, and the second on the left.
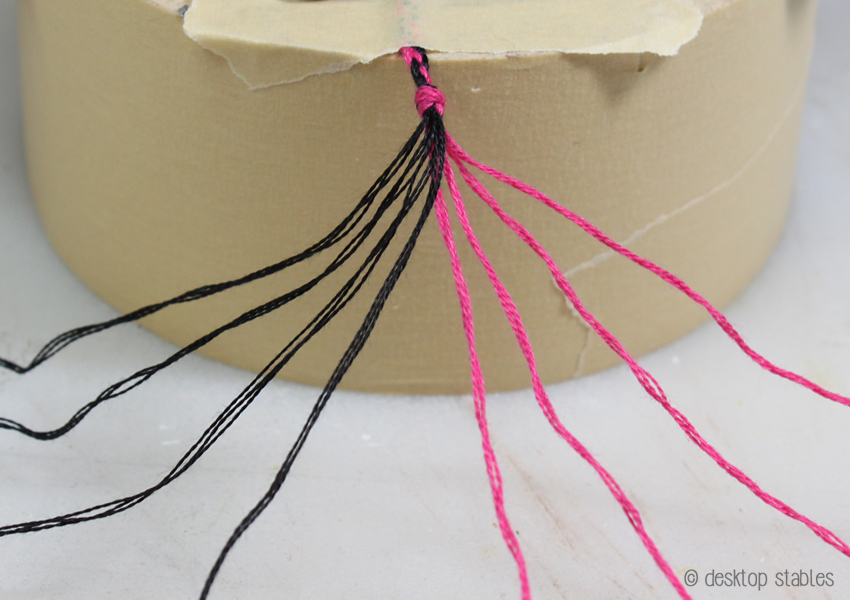
Again, HERE is the tutorial I followed for the braid. This braid is also very simple, but like I said, keeping the strands separate in this scale is tricky until you get the pattern down. It’s also slow-going because it’s so small, but the end result is worth it.
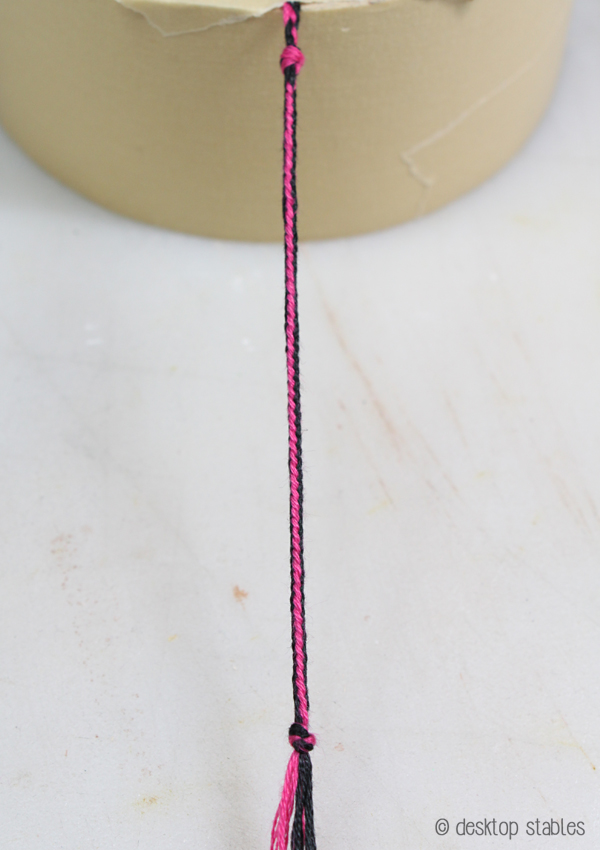
Continue with this braid for about 9 cm, then tie another overhand knot. Whew!
Arrange your strands into four, like we did in the beginning, and continue with the four strand braid. When you’ve gone another 12 cm or as far as you can, knot the end and trim off any excess.
Tie two overhand knots in the round braided section, keeping them about 2 cm apart. Use your sketch for reference, and keep them loose until you have them positioned the way you want them:
The four strand braid has a natural twist to it which is unavoidable, but really annoying in miniature. I tried to tone it down some by pressing the entire braid with an iron, and it seemed to help.
To make adding hardware easier, saturate each end of your reins with Fray Check (or something similar, regular glue should work as well) and let dry completely. Do this close to the knots on each end. Once dry, cut off the knots.
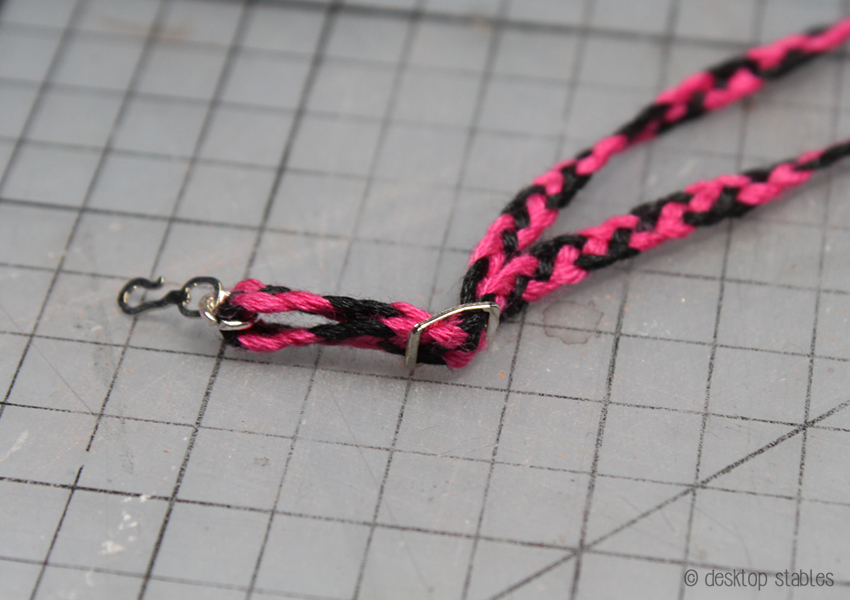
Thread on a buckle, bottom to top. (if you’re using etched hardware, bend the buckles slightly beforehand) Add your jump rings/hooks, then fold over your braid and thread it back through the buckle.
Repeat on the other side, then go back to your sketch and adjust your reins to size. You can further adjust them on a model too. Lastly, determine where you want to trim the excess braid and cover it generously in Fray Check. Trim once completely dry. Please note that this will not permanently seal your braid ends, but it will help keep them from unraveling. Excessive handling or threading them on and off the buckles will cause them to come apart, so re-apply if necessary!
Your reins are now complete!
The braid pattern can be changed up by switching the order of your threads (the links I referenced show some good examples of that) and the color combos are endless, so have fun!

Wow those reins look amazing! I can’t wait to try making some myself! Thank you so much for the Awsome tutorial! 😄🐴
They look great, and definitely more accurate than the plain three-strand plait. I particularly like the black and blue reins. 😀
Looks great! ❤
I hav the real barrel reins that are in the picture on Phoenix and Sis!!
How do the western bridles stay on without a noseband?
Sticky wax! This can be found at riorondo.com. Dental wax works fine too, and that can be found in stores by the toothbrushes 🙂
can you use them on horses