
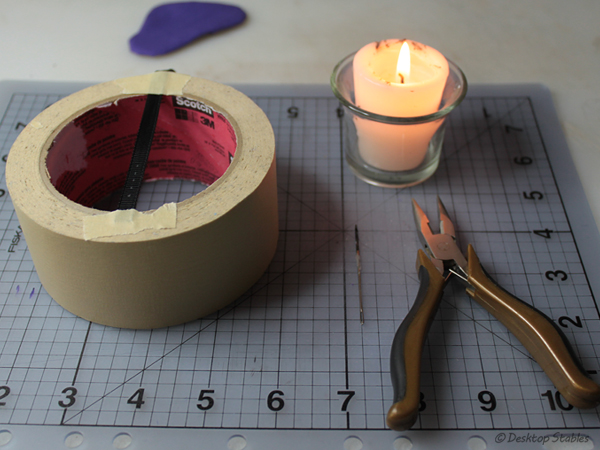
I make tongue buckles in ribbon by melting holes. The holes are sealed this way, so they won’t start fraying and shredding your ribbon. It does require some practice though. I would recommend making several holes in a piece of scrap ribbon just to get the feel of it first.
Also, use common sense. I don’t think this is particularly dangerous but you’re still going to want to be careful so you don’t burn yourself or set anything on fire.
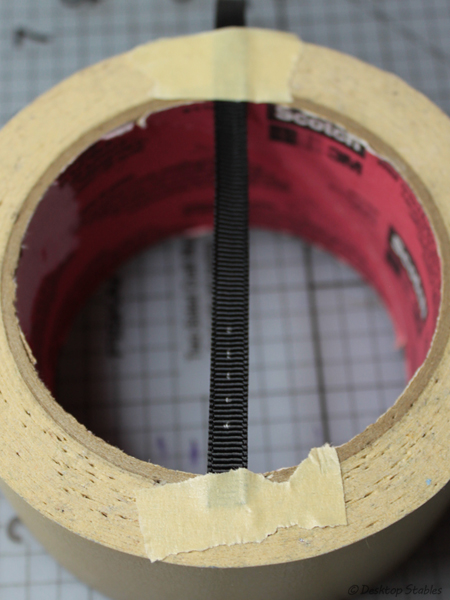
Ok! One thing that helps me is to secure the ribbon to a roll of masking tape. This frees up my hands and keeps the ribbon nice and tight.
I use a thick needle for this. Using a pair of pliers (do NOT hold it in your fingers) I hold it in the flame for a few seconds…
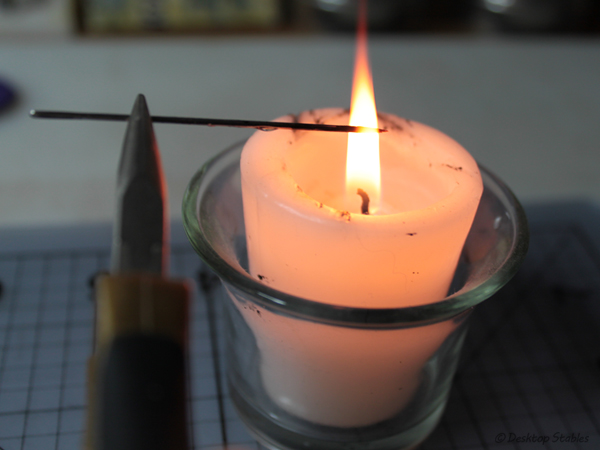
…then hold it at a perpendicular angle and gently pierce a hole in the ribbon. If it doesn’t melt, hold it in the flame for a few more seconds and try again. Like I said, it’s a good idea to practice this several times on a scrap piece.
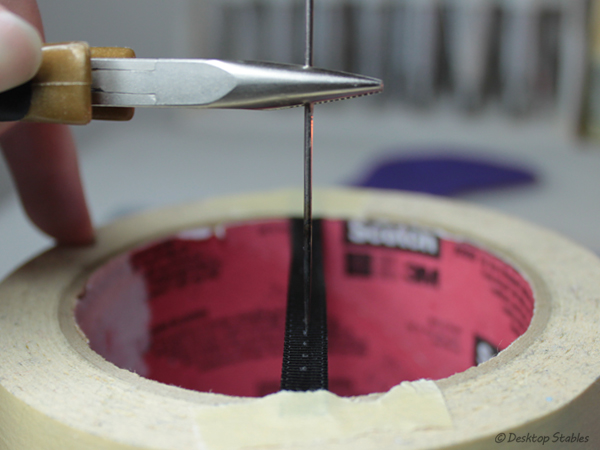
Eventually you’ll have a row of tiny holes. 
For the handle, cut a 2 in piece of 1/8 ribbon. Glue one end to the underside of the girth strap, (I flipped that strap over to hide the silver dots I missed, whoops…) then glue to the top of the pad. Fold the handle underneath the pad and glue in place.
Before stitching, I like to lightly trace around the pad with white chalk. This acts as a guide when I’m sewing and can be easily rubbed off later.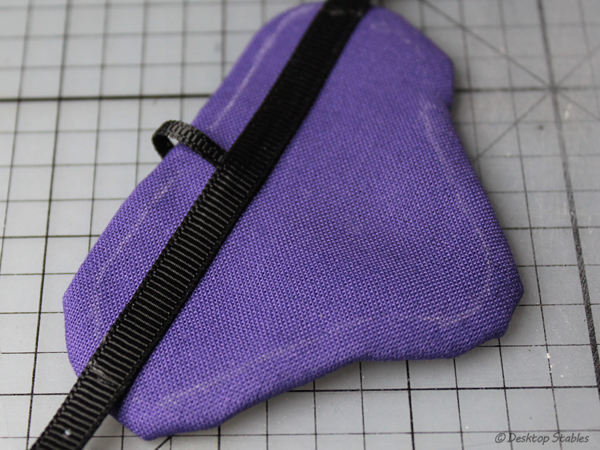
Sew around the pad, by hand or machine, whatever you prefer. I’m using a backstitch here instead of a running stitch. Remember to sew through the girth strap, and if you can, catch the underside of the handle as well. (but don’t sew it down!)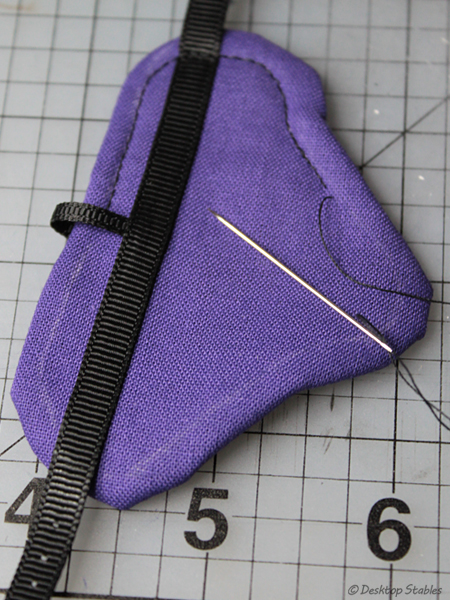
To cover up everything underneath, cut a piece of material using the pattern, then trim it down to size. I have used fabric in the past, but keep in mind that this will need to be sealed to help prevent fraying. (This red pad here needs more work, haha) For this example, I chose to cut a piece of black felt instead. It’s a bit more bulky but won’t fray.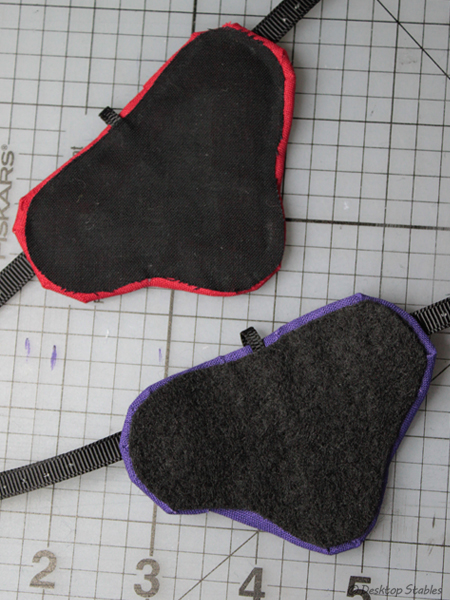
Next, taper the ends of the girth strap, seal them and your bareback pad is complete!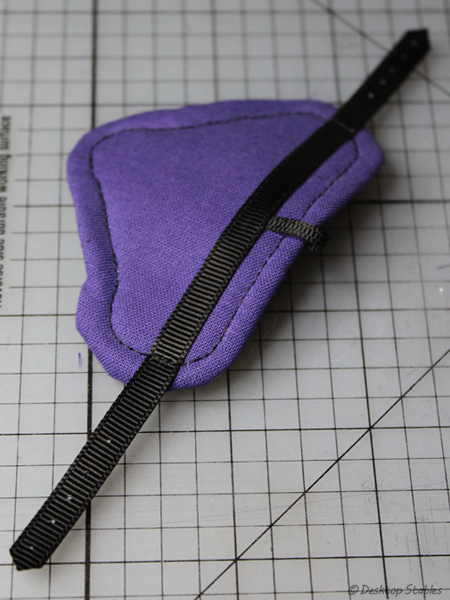
To make the girth, fashion two buckles from wire (what I’ve shown I’ve hammered flat, but leaving it round is fine too) add tongues and attach to another piece of ribbon. You don’t have to melt holes for the tongues if you don’t want to. I’ve had good luck by just cutting a tiny notch and sealing it once I’ve attached the buckle.
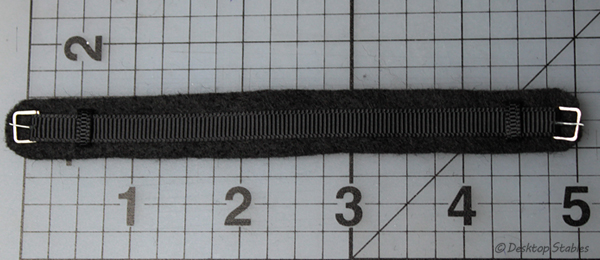
I’ve backed the entire thing with another piece of felt so my horses won’t be scratched. This one measures about 5 inches and fits larger models. A 4 inch girth fits smaller horses, but you’ll want to measure your horse anyway to double check.
There you have it! Have fun. 🙂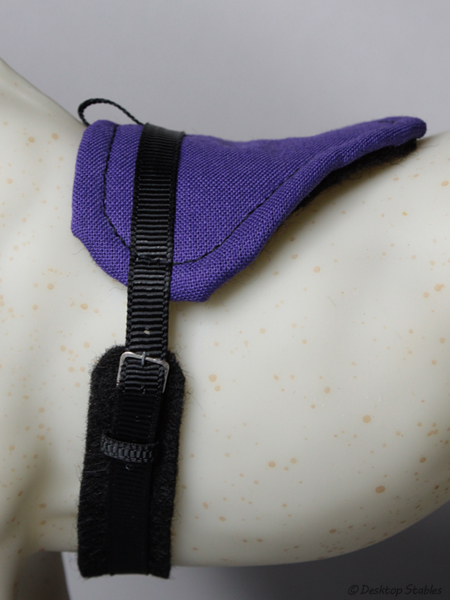

😀
Thanks nice tuturial! Makin one of these right now
Yup, definitely going to make one of these at some point soon! 😀
Thank you so much for this tutorial! I love the way your bareback pads look, but what was really of help to me was the how-to on the holes in the straps. 🙂
I need this for a halter I am going to make, soon.
Glad you find it helpful! 😀
How did you make the buckles for the girth?
They are made from bent wire – I flattened it with a hammer after shaping it. 🙂
Ok! Thank you! 😊
Could you please do a tutorial on how to make the buckles?
I’m a little confused.
This is fabulous!
This is an amazing tutorial. I love your beautiful tack and accessories!!💙 You inspired me a lot. Thank you.
So happy you like it! 🙂
Great idea!
Greetings from Poland!
Thanks so much! Just finished one for my Stone ISH. Also, just an FYI, nails work great too for making those little holes. They’re cheaper and larger. 😉
How to make buckles
this is perfect! I was wondering if you could do some Schleich tutorials, because I love Breyer but I have more Schleich than Breyer.