

It’s been a while since I’ve written a tutorial. I’ve never written an actual tack tutorial before so if you come across something that doesn’t make sense or isn’t working, please let me know! (this also applies to my past stuff… sometimes what makes sense to me doesn’t make sense to anyone else)
My method for making these isn’t “perfect” but they’re not extremely difficult either. It does require some sewing, a very, very hot needle and patience/practice.
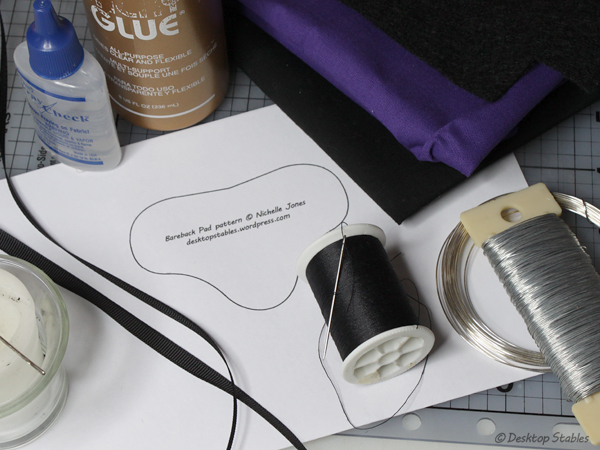
You will need:
- Bareback Pad Pattern – print in actual size if possible
- fabric for your pad (mine’s purple but my camera hates that, so it looks blue, yay)
- felt
- 1/4 and 1/8 in ribbon (I’m using black grosgrain but you can use whatever you would like)
- wire for the girth’s buckles
- needle and thread
You’ll also need a candle, a large needle that you never plan to sew with again, glue and something to seal fabric ends, like Fray Check.
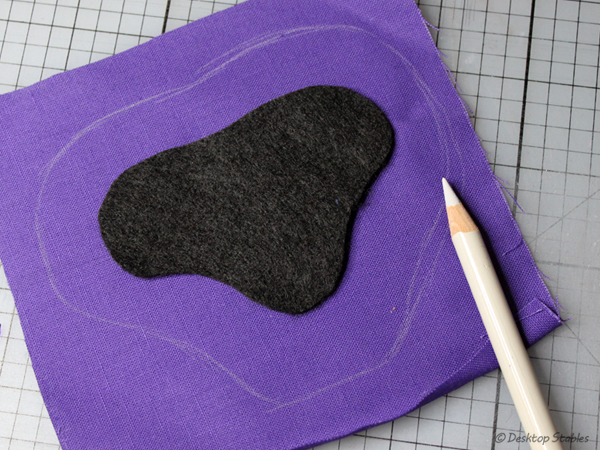
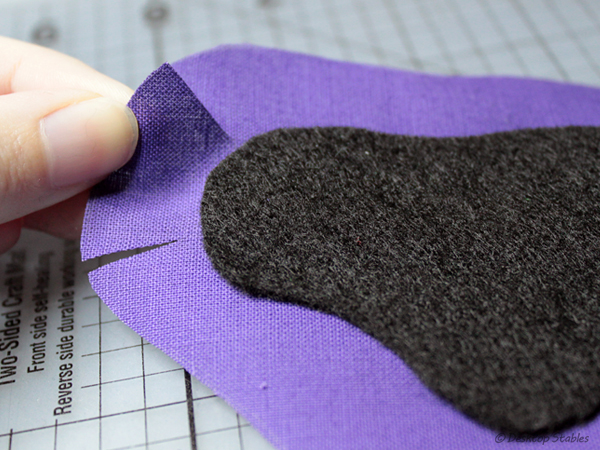
Start off by cutting the pad out of felt. Lay this on the wrong side of your colored fabric, then loosely trace around it, like so.
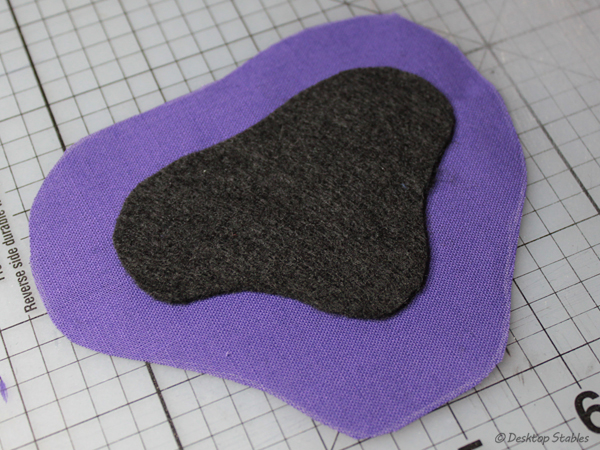
Cut that out and glue the pieces together. It doesn’t need much at all, just enough to keep it in place.
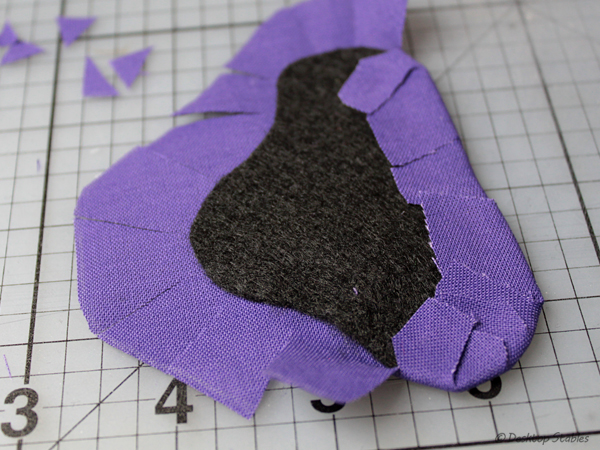
Next you’re going to make small cuts in the fabric, especially around the curves. I’ve found it helpful to start at the curves on the sides. It’s definitely a trial and error sort of thing.
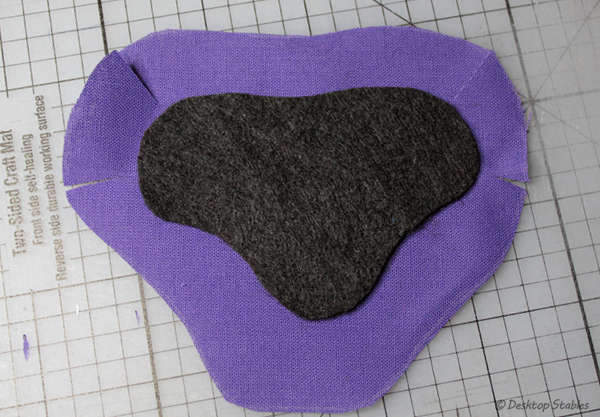
Be careful that you don’t cut too close to the felt. You’re going to want to leave a small gap there.
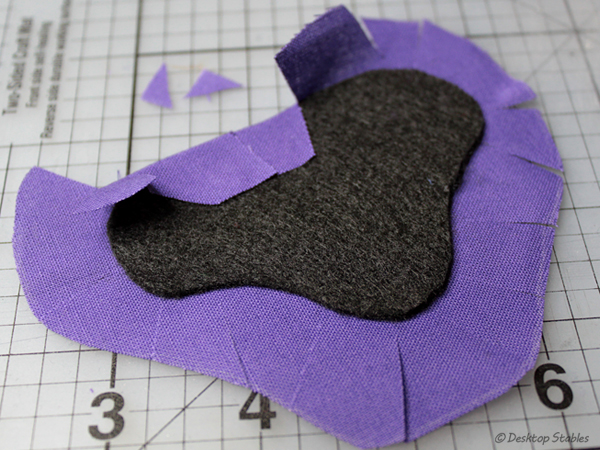
Eventually it’ll look like this…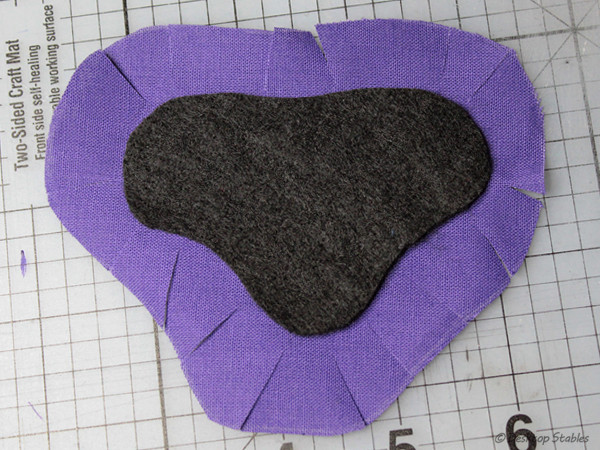
It’s Simba! Right?
Anyway.
Once you have it cut, begin folding the tabs over and gluing them down to the felt. You may have to make more cuts to adjust, and cut off corners and such.
Continue around the entire pad…
… until all the tabs have been glued down. It looks so pretty right now, doesn’t it?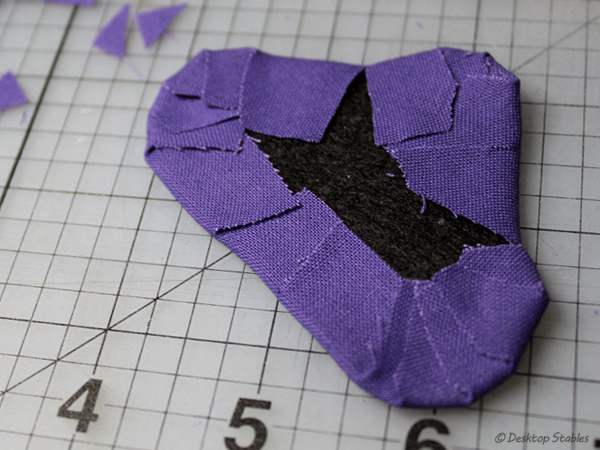
Here’s what it should look like on the other side: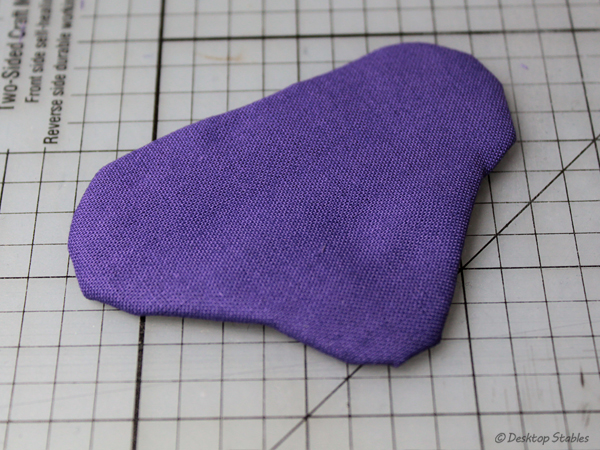
For the girth strap, cut a 7 in piece of ribbon (or whatever you’re using) and center it over the pad. If you’re using slip buckles instead of working tongue buckles, you can skip the next few steps. 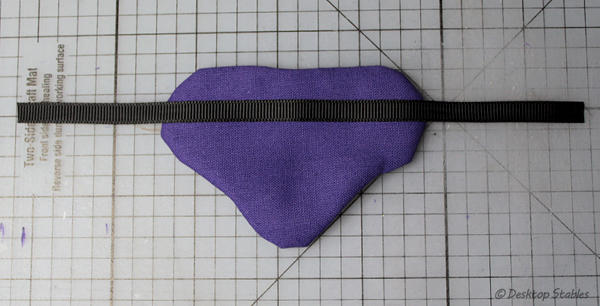
Keep that in place (tape helps) and mark off where you want the holes in your girth to be. I’m using a silver sharpie but a white pencil or chalk should work too. I’ve found that doing this now makes melting holes A LOT easier.

Repeat on the other side, as so.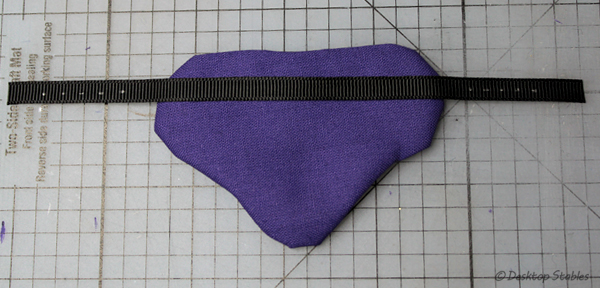 That’s all for today – part two will be up shortly!

Oooh, this looks like fun!
(I lost it at Simba by the way. XD)
I couldn’t resist adding that XD
simba – haha nice.
Simba got a chuckle out of me, too! : )
This is awesome can’t wait to try it!
Wow! I really didn’t think that’s how you made them! I thought you doubled the fabric over and really neat stitches xD still looks amazing, and that’s a lot easier than sewing it 🙂 thank you!!
(Simba made me laugh :D)
cool
So cool I’m going to make it:)
looks great;) waiting for part 2!!
(Simba–xD)lol!
Part two can be found here: https://desktopstables.wordpress.com/2014/09/19/bareback-pad-tutorial-part-ii/ 😀
Wie groß ist das pad ?
Wo gibt es die Vorlage zum ausdrucken ?
It’s Traditional, 1:9 scale. The pattern is linked in the list of materials. 🙂
Wie breit ist das ripsband ?
Cm ?
It’s 6 mm wide