
I have another tutorial for you all today, this time on braided cotton reins.
I’m basing my reins off of these by Tough-1:

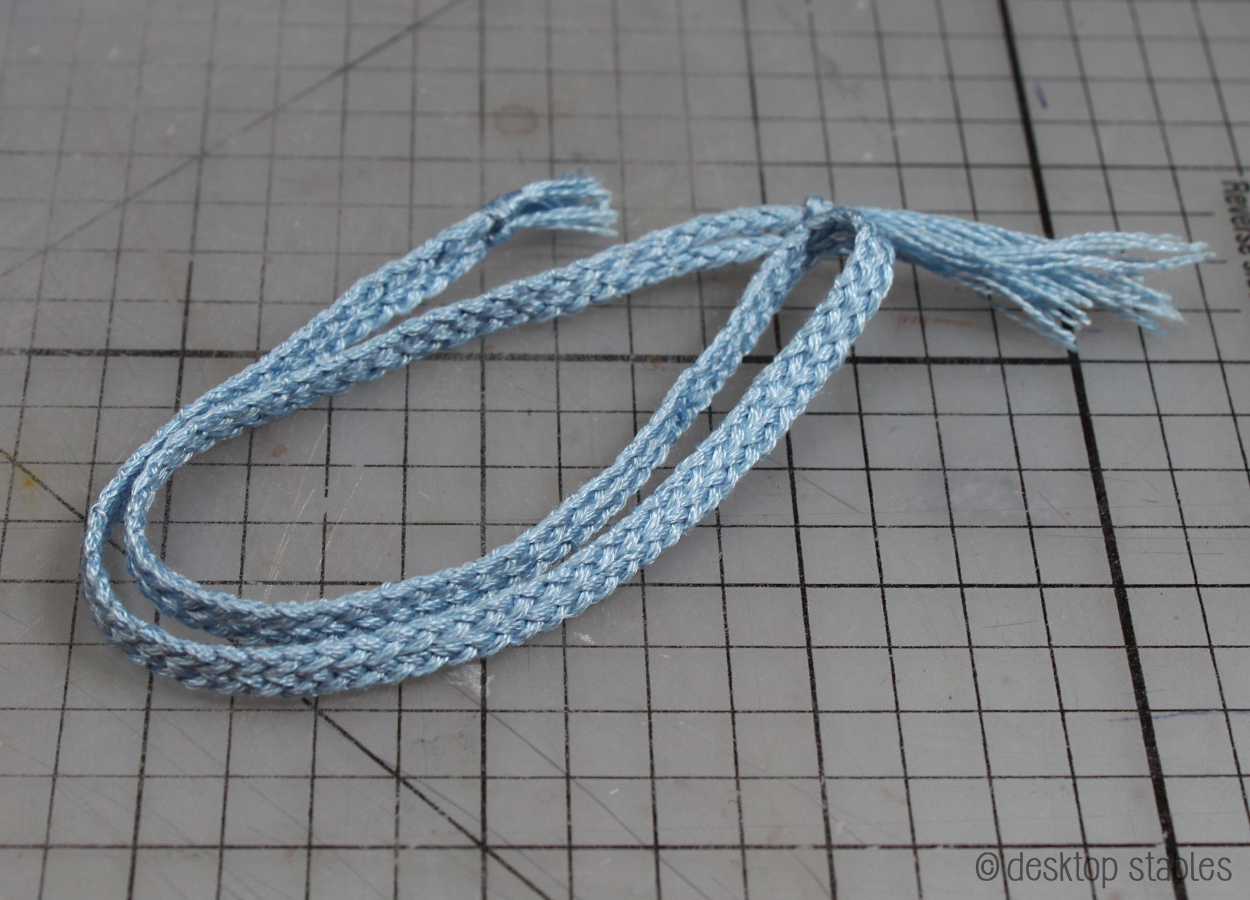
Finished set:

They’re pretty simple to make. This is the same method I used to create reins to go with a Barcoo bridle. In that case, I created two braids with buckles on each end and in the center:

This is also how I used to put together Arabian halters and breastcollars:

For materials, you will need embroidery floss, 1/8″ ribbon (I buy my ribbon from Hairbow Center) and hooks for the ends. These came from Rio Rondo but you could also shape some out of wire.
You will also need Fray Check, a needle, a lighter (this is optional) and glue. My go-to glue for ribbon or fabric is Fabri-Tac.

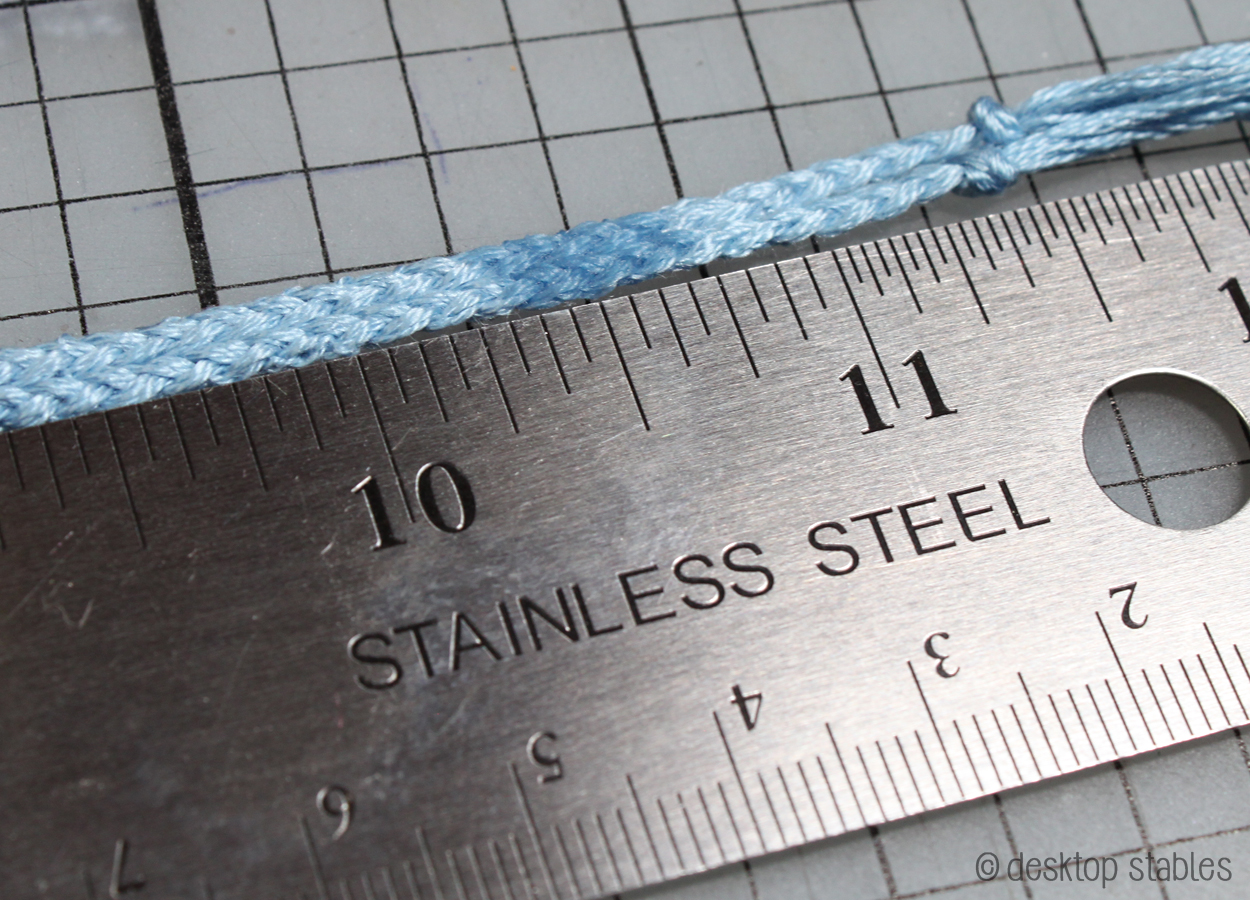
The reins I’m basing these on measure 7 feet long. In 1:9 scale, this measures down to 9.333… inches, so to make things easier, you could keep it around 9-10 inches.
I start by cutting 6 strands of embroidery floss measured at 16 inches long. For longer reins, you’re going to want to increase this length. It’s always better to have too much than not enough!
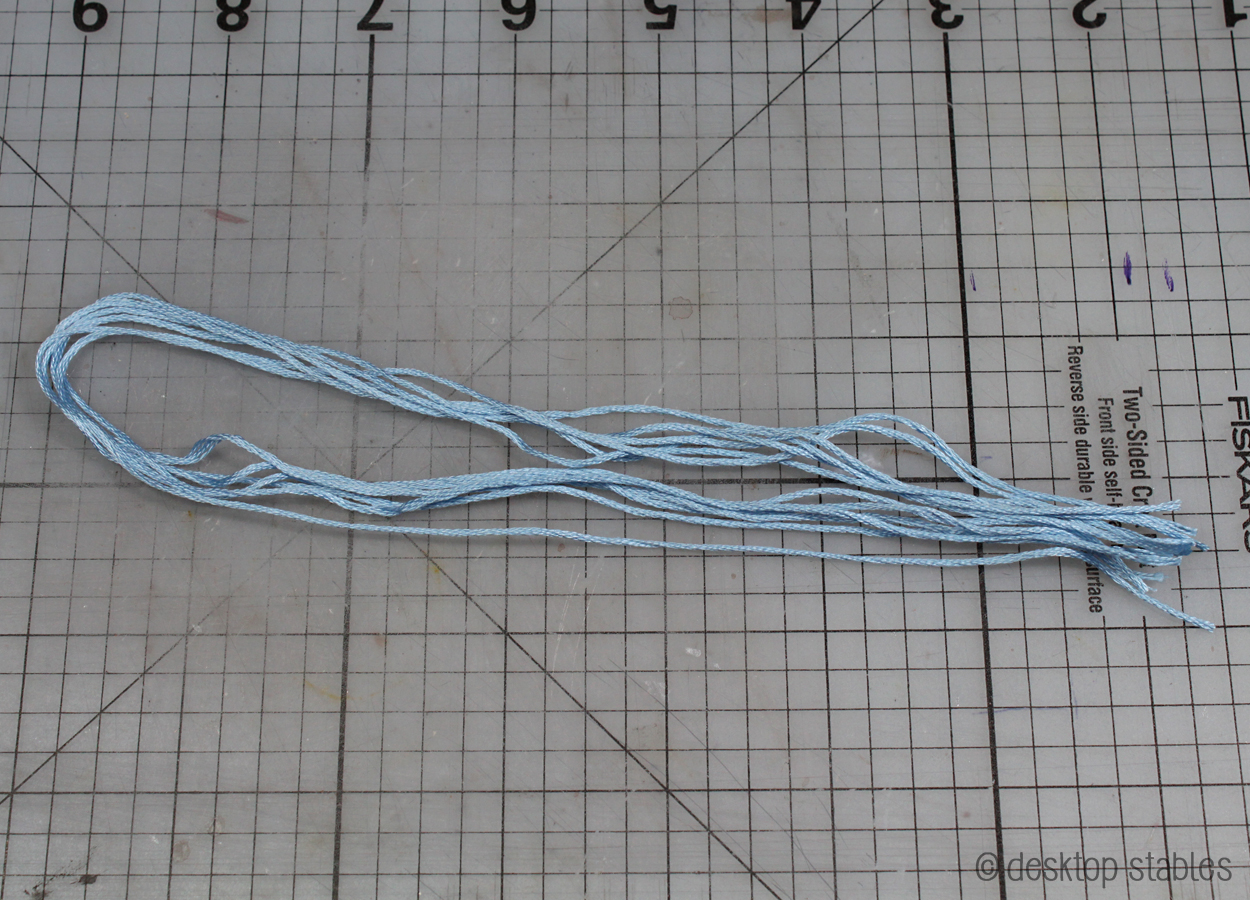
Split the strands in two groups of three, then braid them. I’m using a basic three strand braid here.

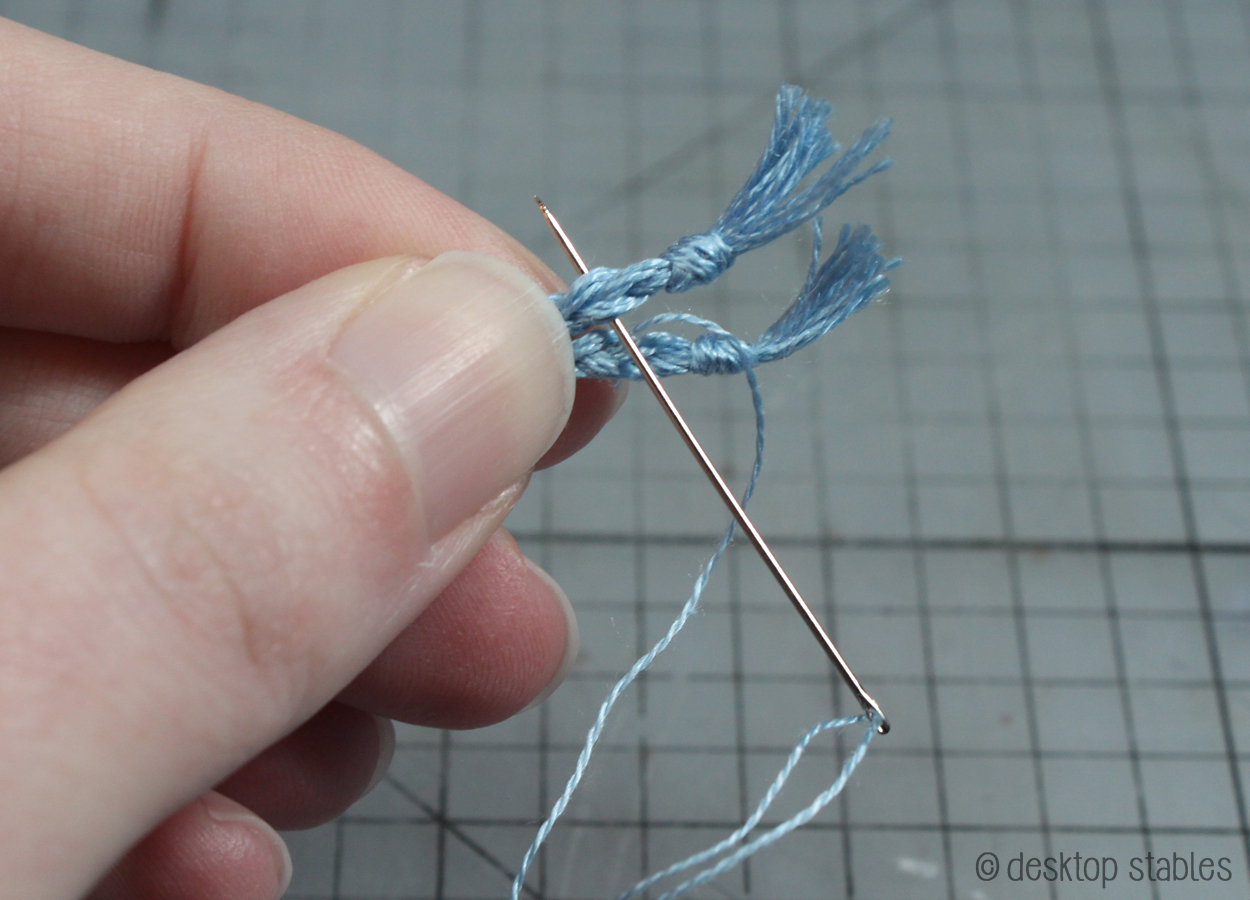
Next, it’s time to sew them together. I use a separated strand of embroidery floss cut three times the length of the finished braid. This will blend much better than trying to find a thread color to match.
Knot one end, then bring your needle up through the center of one of the braids.

Bring it straight through the second braid,
Then back down through both of them.
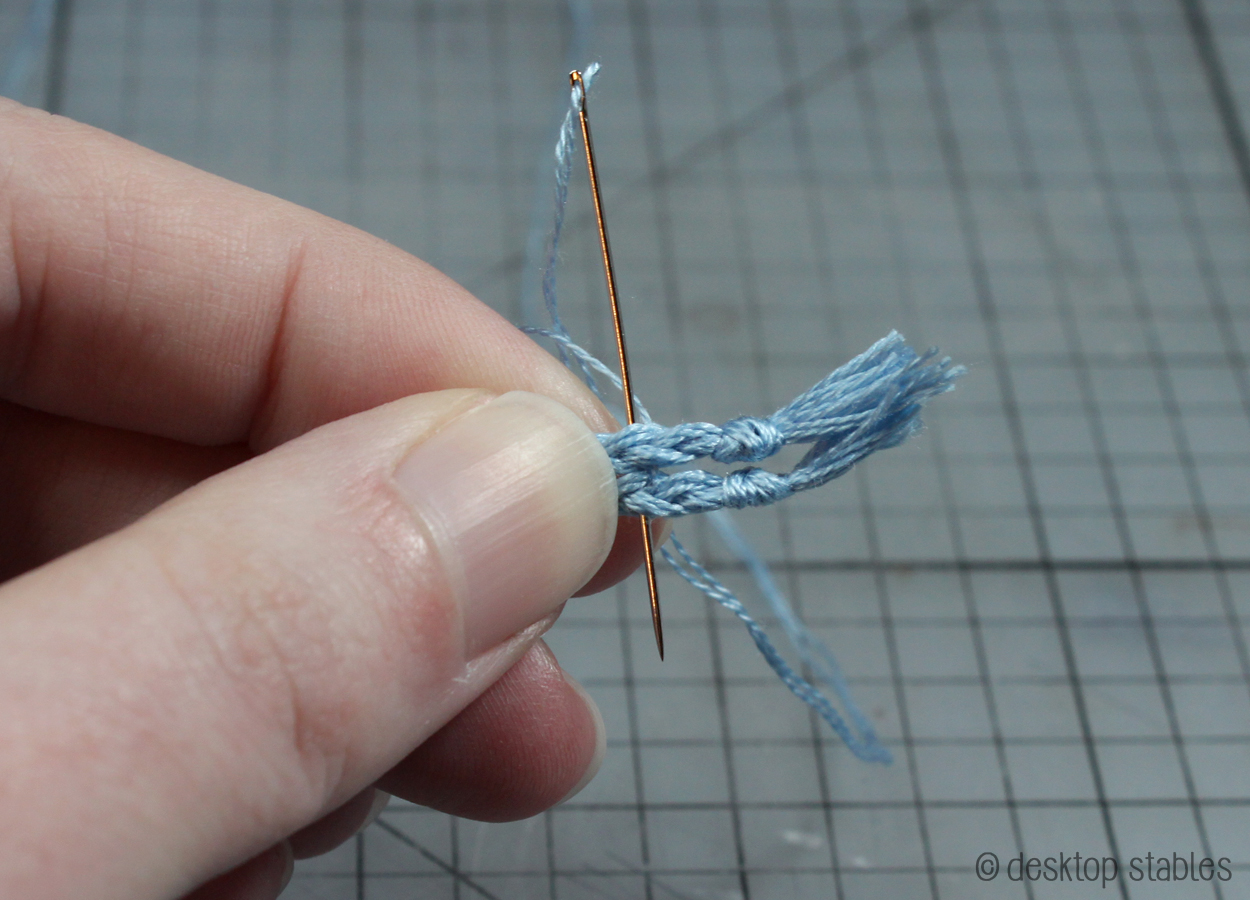
Continue with this zig-zag or serpentine pattern throughout the entire braid. You want the thread to be snug, but not so tight that it pulls the braid out of shape.
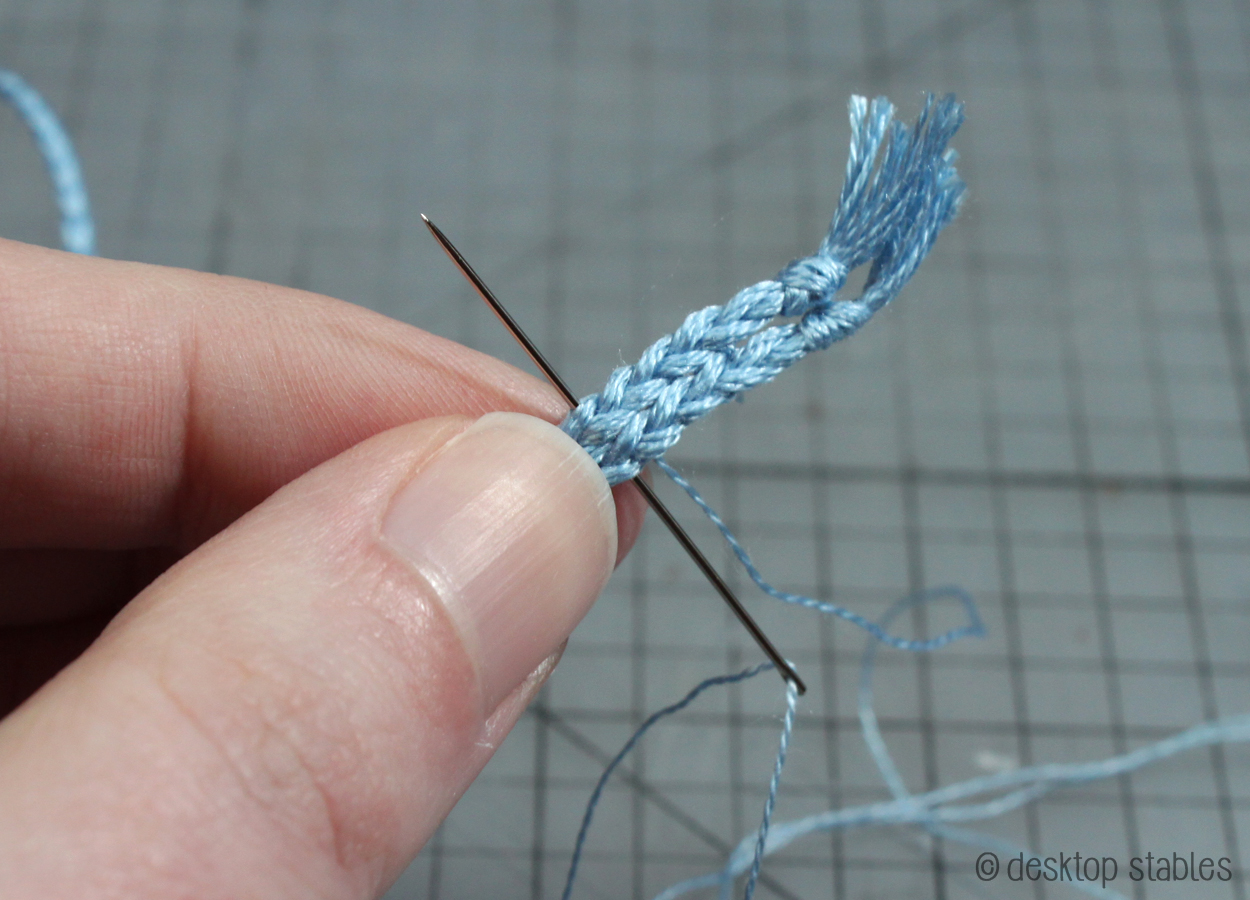
To finish the sewing, bring your needle up through the center, wrap the thread around it 2-3 times, hold it tight, then pull the needle through.

Completed braid!
Next, measure how long you want your reins to be, and cover this area in a generous amount of Fray Check. Cover both sides, then let dry completely.
I decided to cut mine at 10 1/2 inches.
One dry, cut through the braid and wrap the ends in ribbon.

For the hooks, I threaded one of the etched pieces on a tiny piece of ribbon, then sealed one end with a lighter. You can always use Fray Check to seal it instead.
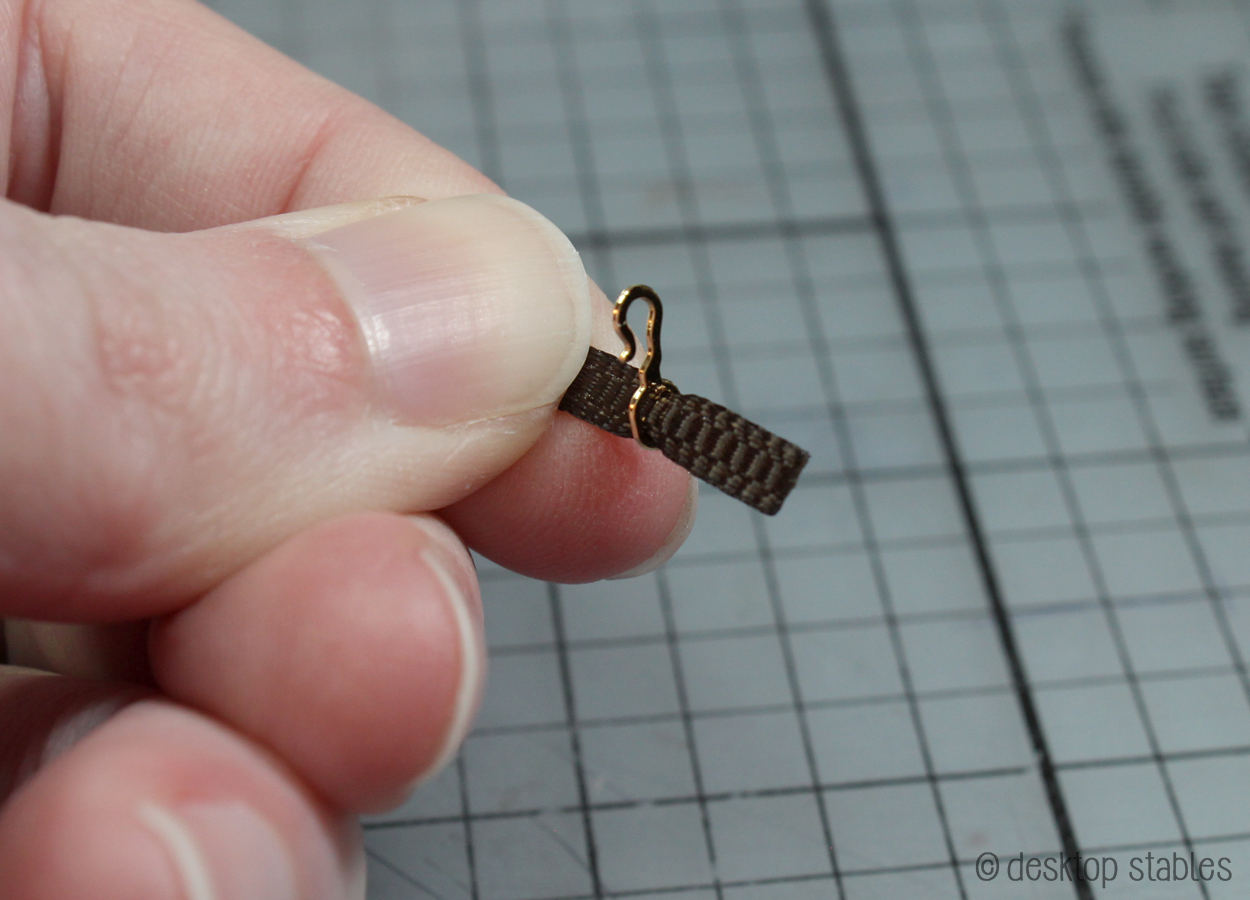
I glued this down to be flush with the wrapped braid, then folded it over and trimmed down the other side.

With that, the reins are complete!

These can be made in any color you’d like, so have fun with them!


Awesome tutorial, as always!
Thanks for the great tutorial!
Adorable! I wish I could be as good as you!
Also, what color is your arabian stallion model?
He’s a light chestnut I think 🙂
Thank you! I think I am going to get one!
Nichelle, I think I have been on your blog for to long, does 3 hours sound to long to you?
Oh I’ve done the same on other sites! 😀 Glad you’re enjoying the blog 🙂
Me too!
The person “c” Was me. Oop!
awesome!
SO COOL
SOOOO COOOL
what that model at the top?