

I didn’t originally intend this to be a tutorial, but since I documented the process (something I’m trying to get in the habit of doing) I thought I would go ahead and share how I made these tiny mane/tail brushes.
I went with two different styles, modeled after brushes for real horses:

For the double-sided brush, I started by sketching out the shape on a popsicle stick:

I shaped it down by carving large bits away with an exacto knife (much like skiving leather) then using a file to further sand down the edges. (a dremel might come in handy here, just don’t sand your fingers off!)

Using an embossing tool (I use nail art tools) I made a sort of indent on both sides of the wood:

Looking back now I don’t really think it was necessary, but oh well, onward!
I made the bristles and pad (have no idea if this even has a name, ha!) from very thin beading wire. The thinner, the better, I think.
I also used white Super Sculpey clay, and TLS. (Translucent Liquid Sculpey) The TLS acted as a glue to get the clay to stick to the piece of wood.
Once the pad-thing was stuck down, I cut up a ton of wire pieces, then dipped one end into the TLS before poking it into the clay. This was tedious.
Again, the TLS is acting as a glue here, to give them a little more strength.

Once all those were in place, I baked it for a few minutes to harden the clay, then added a tiny bit more TLS around the bristles, and baked it for a couple more minutes.
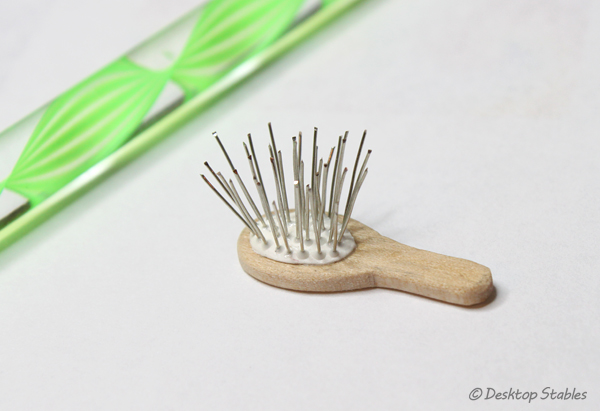
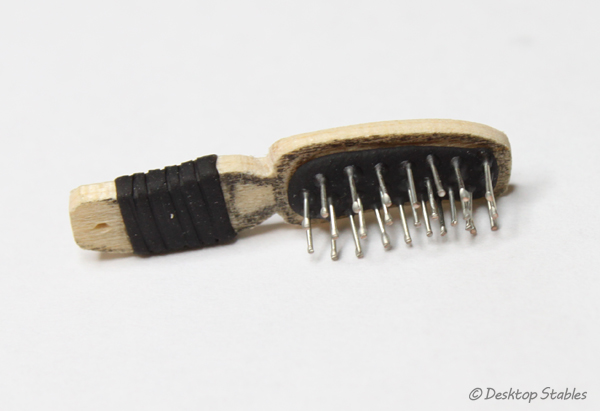
When that was cooled, I started cutting down all the wires, till they were the length I wanted them. To make the ends less sharp, I dotted more TLS on the ends, then baked it for a few more minutes to harden.

The handle was “stained” with watered down paint, the tops of the bristles were covered with silver paint, and the entire thing was varnished:

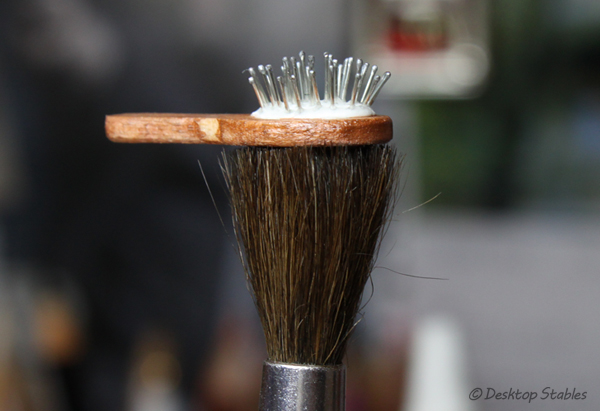
For the other side, I trimmed an old useless paintbrush down, applied tacky glue to the side of the brush (I guess that hollow did come in handy here) and stuck it on top to dry:
Once dried, it got chopped off and trimmed down to size.

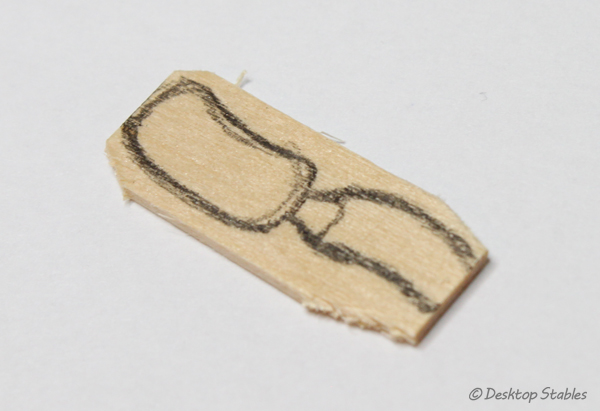
The curved brush was made almost the same way. This time I started with a small craft wood piece. (there’s a brand called “Woodsies” I think, that can usually be found in bags at craft stores)
The shape was sketched on like before, then cut, carved and sanded to shape.
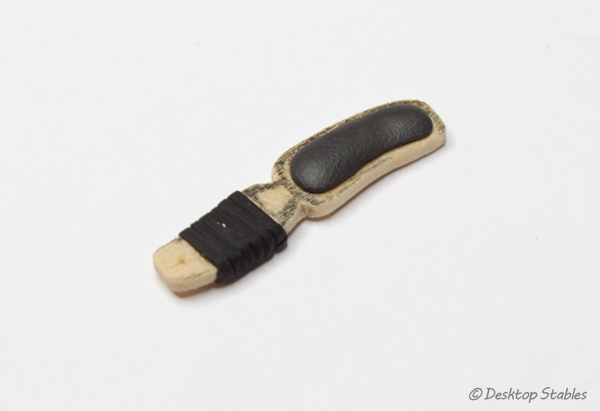
I also used TLS to attach black clay to the wood. The handle was made from a very thin strip of clay, which was wrapped around and textured using the back of my clay blade/cutter.
Also, I DID pre-bake the piece with the handle BEFORE adding the black pad, so I wouldn’t mess it up later. I just failed to get an image of that. >_<
Add the bristles just like before:
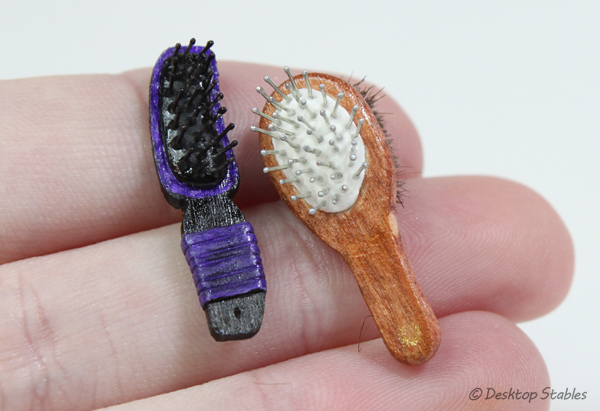
And here it is, with a few coats of paint and varnish:


I’m happy with how they turned out and of course have ideas for more… but this is good enough for now, I think. I still have a bunch of other grooming-kit pieces to make, ack!

They’re so cute! Your miniatures are so realistic, it’s insane. 😍☺️
Those look AMAZING! I’m definitely going to have to try some smaller scale ones now!
so clever!
You blow my mind, Nichelle!
HOW DO YOU DO IT!!!!!!
The double sided one is my fave, but they both are super cute! Your attention to detail is fabulous and thank you for the tutorial!!
It was so smart to use an old paintbrush, recycling for the win! You could probably use the handle as broom stick too. ^^
Looking at the tutorial, I bet it would be easy to make body brushes and dandy brushes in a similar way – cutting out a wooden oval base, indenting, gluing ‘bristles’ on, and for the body brushes you can add a cute strap! 🙂
Love your tutorials and blog, thanks again! 🙂
Thanks! I’m planning on making more brushes in a similar way… just waiting for materials to arrive first 😀
Ah I see! I look forward to seeing what you think up, you have some complete genius ideas 🙂
Thank you so much, I’m definitely going to try this
Great project!! So cute! 🙂
They’re adorable! It’s so cool how you come up with these things! I love ’em all! 😉