
Over the past few years, I’ve done a lot of sewing. What started as making stuff for my models led to a full-time job for a linen company as a mender/seamstress. (I’ve since then taken over another position with the company, but still sew when we’re short-handed, which is often… but that’s off topic…)
Also, ~disclaimer~ I’m entirely self-taught and am not a “pro” by any means. I have so much to learn and am always looking for ways to improve. Most of the skills I’ve learned are very basic, but I’ve gotten comfortable with them because of the number of hours I’ve spent using a machine. Those hours have actually been the most valuable thing I’ve been able to apply to miniature work. It takes some time to get comfortable with a sewing machine, but if you keep at it, you’ll begin to see improvement. The same could be said for any skill!


Even though practice is the #1 tip I will give anyone, I also want to share some other things I’ve learned over the past few years. This is (hopefully!) going to be a series of posts.
And no, a free pattern and tutorial for a saddle pad/blanket/etc won’t be happening on this blog. What I will share can still be applied to your projects though. It’s taken me years to develop my patterns, and like I said, hundreds of hours working a sewing machine, so please respect that.
First things first – tools and supplies!
Machine

I sew on an old Sears Kenmore. It’s a workhorse, very heavy and solidly built, and can be a total piece of **** until you get to know it. (or it gets to know you…)
Do you NEED a sewing machine to sew for models? No. But it also depends on what you’re going to be doing. Are you going to be making dozens of pony pouches or the occasional blanket? It’s entirely possible to sew everything by hand, but it will take much more time. I rely on a machine for the time it saves and the quality of the finished product. Also, if you’ve been reading my blog for a while you’ve probably seen me complain about my bad wrists. (which, thankfully have gotten better if I don’t overdo it) Hand stitching everything is just not an option for me. In some cases hand stitching is unavoidable, especially on very small pieces or in tight spots. It just depends on the project I’m working on.
If you think you’d like to use a machine, I wouldn’t recommend buying one right away, especially if you’re not experienced with using one. Instead, borrow a machine from a friend or family member if you’re able to. That way if you decide that it’s not for you (I have seen this happen multiple times!) you’re not out several hundred dollars.
As for machines in general, it’s going to come down to personal preference, what you’ll be using it for, and price. I can’t recommend any particular model or brand, and don’t want to because personal preferences vary so much. That said, I’m much more drawn to non-computerized machines with basic stitches. It seems like new machines are built with plastic parts instead of metal, which reduces the weight, but it makes me wonder about durability in the long run. I’ve also noticed that many machines have built in computers, which some people love and others hate. I’m not familiar with these but they also make me wonder about durability.
If you’re shopping for a new machine, definitely do your research first. Reviews on Amazon can be very helpful, as well as on Youtube. If you can, stop in a quilting/sewing shop and ask for opinions too. I want to say that some stores sell refurbished machines, which might be an excellent option for you as well.
Favorite Tools
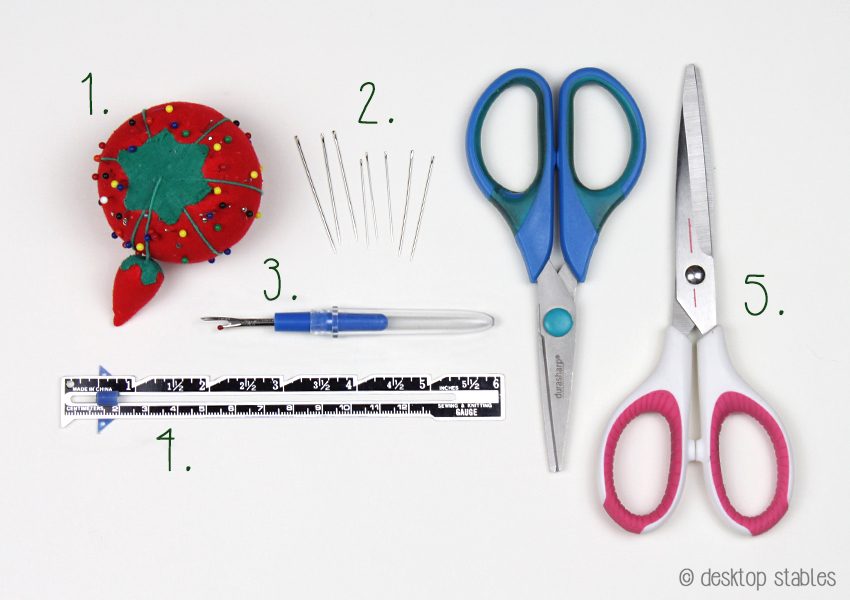
These are the tools I regularly use in my sewing kit:
- Pins and pincushion
- Assortment of needles of all sizes. It’s nice to have very small ones and at least one large one with a large eye.
- Seam ripper – you will need it. Trust me.
- Seam gauge – I use this mainly for sewing bias ends together on blankets and pads. The sliding plastic bit in the center makes remembering specific measurements very easy!
- Scissors – I am a bad sewer and haven’t invested in a proper pair of scissors yet. I am especially bad because I use one cheap pair for nearly everything, which is a big no-no when it comes to sewing. The white pair I limit to cutting ONLY fabric though, so I am trying!
- A thimble (not pictured but I use this one) – for the longest time I thought thimbles were more of a hindrance than a help. Then I realized that my metal one was just the wrong size. Ideally you want one that won’t fall off your finger when you relax your arms at your side. They also come in different materials and sizes. Personally I use one when I’m doing hand stitching or embroidery, as I use my middle finger to push the needle up through the fabric. I also use one at work to pin packing slips to garment collars – without one my finger splits. And that HURTS.
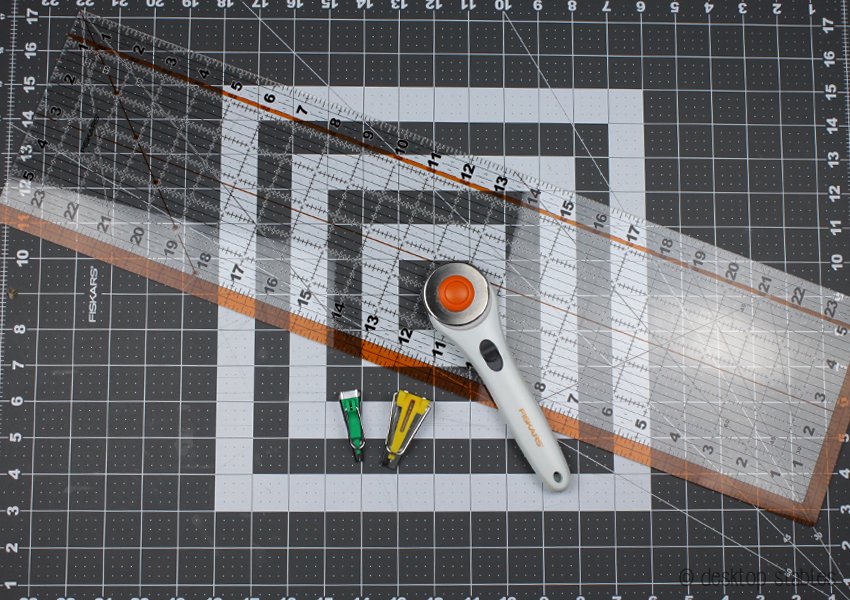
I also use a large cutting mat, plastic ruler and rotary blade – these I purchased together in a set. I use them mainly for cutting bias strips from fabric. I have a couple bias tape makers too. These are great for making folded bias tape quickly.
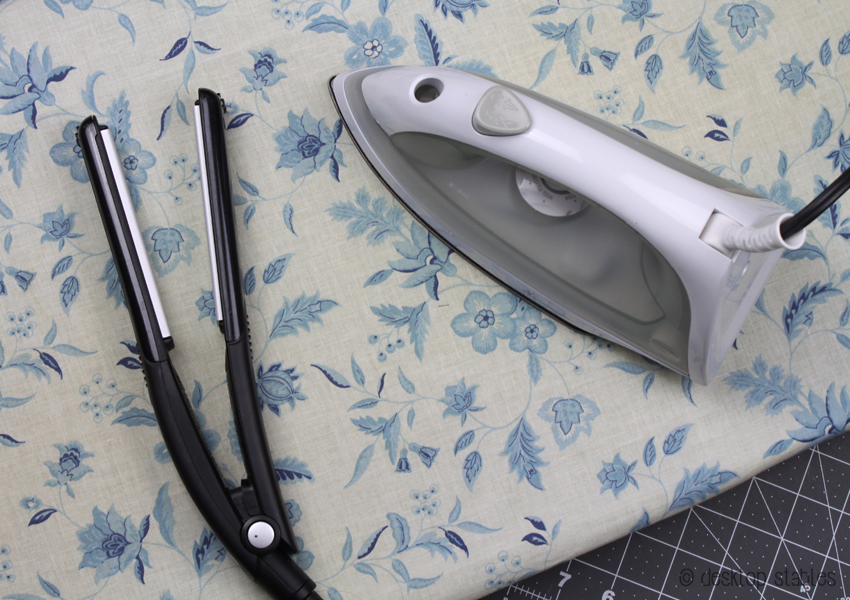
An ironing board and iron are also “must have’s” for me. For really small pieces I’ll use an old flat iron. You can laugh if you want, but I swear I get better folds on small pieces like saddlebags with a flat iron than a regular iron!
Misc Supplies
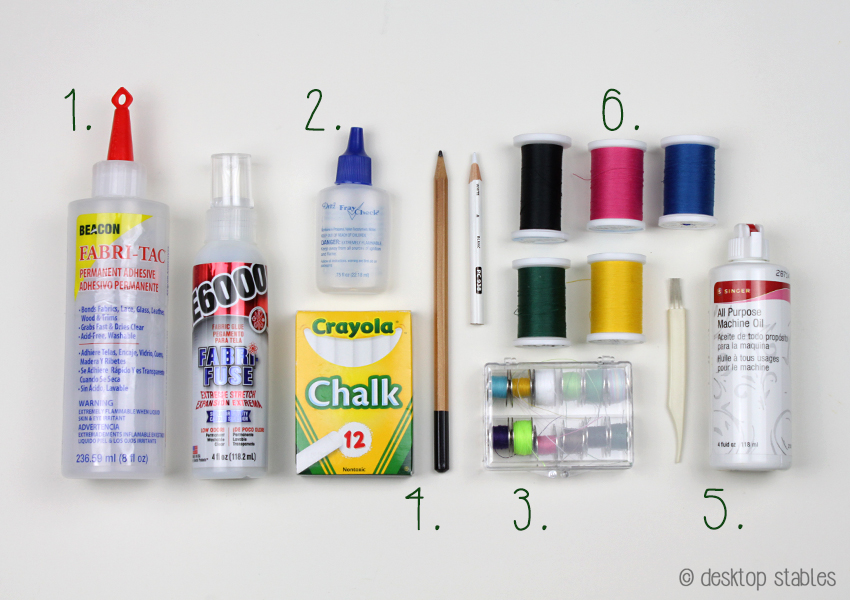
- Fabric glue – my favorite is Fabri-Tac. I’ve also got a bottle of E6000’s fabric glue that I’ve been experimenting with.
- Fray Check – this stiffens your material so it doesn’t fray. It can darken some fabrics, but it’s nice to have.
- Extra bobbins – what size you need depends on the machine you’re using. I buy them in handy little plastic boxes and wind them in whatever color I need.
- Chalk and/or a white pencil, soft lead pencil – I use regular chalk to mark lines for quilting, measuring, etc, and use a scrap piece of fabric to rub it off later. A white pencil I use to trace patterns or make marks that won’t be seen, as it’s not removable. I’ll use a drawing pencil with a soft lead for lighter colored fabrics, also for lines that won’t be seen.
- Machine oil & lint brush – how often you need to oil your machine depends on how much you use it. More info on that can be found in the machine’s manual. A small brush for removing lint is necessary though. (an old paintbrush will work fine) I sew through a lot of felt so my machine gets full of fuzz often!
- Thread – I generally use all-purpose thread as it comes in a bazillion colors. One thing I’ve learned is whenever you buy new solid colored fabric, buy thread to match it. I don’t know how many times I’ve sat down with a pretty new fabric only to realize that I have NO thread to match… and that kind of stuff drives me NUTS!
Fabric
I am a fabric addict and can spend an unnecessary amount of time in a fabric shop, looking and wanting everything even if I have no use for it. But since I mostly sew model horse related stuff, I try to limit myself to fabrics that will work in small scale.
I find it best to shop for fabric in person. That way you can get a good idea of the thickness and texture, as well as color. I normally use quilting cotton for blankets and saddle pads, as it comes in every color imaginable and is easy to work with.

For prints, I always try to keep an eye out for small patterns. I love fat quarters (about an 18″ x 22″ piece) for model horse projects. They give you enough fabric for multiple projects but not so much that you end up with a ton of excess.
Buying patterned fabric online is a lot harder because it’s difficult to tell how big the print is. Some sellers have rulers against the bottom of the preview image, so keep an eye out for those.

Buying fabric can be expensive, so I try to watch for sales and coupons I can use. Fabric stores like Joanns also sell remnants, which are small pieces usually from the end of a full bolt. This is a great way to get discounted pieces of different textures -like tulle or stretchy knits- for test projects.
I also look for pieces second-hand in thrift stores. Old or damaged clothing can be cut up and repurposed too.
Resources
- Sewing Parts Online – what I love most about this site is the huge selection of replacement parts. Filtering by brand and model number (check the back of your machine if you’re unsure – my model number is on a sticker) shows what’s compatible with your machine. It’s very handy!
- Spoonflower – this site allows you to upload an original design to be printed on to fabric. I order my custom fabrics through here. It can be expensive, but it’s an option if you don’t want to print fabric at home. (which isn’t normally washable no matter what the brands claim)
- Fabric.com – this site is dangerous if you’re a fabric addict. So many patterns…! o_o
- Etsy – I’ve only just started looking for fabric through Etsy and it’s also dangerous. One thing I like is how many sellers offer smaller cuts of fabric (fat quarters, half yards, etc) which isn’t always possible with bigger retailers. Supporting small businesses is awesome too. 😉
That’s all for now! 🙂

Wow, that’s a lot of awesome information! Yo7 say you’re not a pro but your work sure looks it…😍
Oh this is so familiar. My mom is a quilter, a fabric addict. How nice to see my two worlds cross. Great start!
Okay, what do you mean by your not a pro! Of course you are!!! STOP DISCLAIMING YOURSELF!!!!!!!!!!
Yeah girl good lord!!!!!!